I remember playing a game when I was a kid called Hugo’s House of Horrors. You controlled Hugo using your arrow keys and typed in commands when you wanted him to do something. In this modern age of spectacular CGI, it’s a thoroughly rubbish game, but back then it was enchanting and both my sister and I absolutely loved it. I didn’t really know what I was doing at all, and it was all just guesswork, but when I think back to that I wonder if that’s where my love of the command line came from.
Now, don’t get me wrong, I love well made, intuitive user interfaces, and sometimes you can’t beat a good GUI, but for me, there is a lot of appeal in the simplicity of text commands typed into a white on black terminal.
When you dig a little deeper, it can, of course, be the complete opposite of simple, but you can’t beat it - there’s a lot of power in the command line!
In light of my passion for the terminal, it’s only natural that I would enjoy using the AWS Command Line Interface. Why point and click, when you can type furiously and smash return?!
We’re going to go through the process of getting the AWS Command Line Interface set-up on Ubuntu 18.04 LTS and then we’re going to launch a couple of EC2 instances using just the command line.
If you are going to be following along, I’m going to presume you are coming at it having never used the AWS CLI tool and that you don’t currently have any current EC2 instances running on AWS. You can of course still follow along, but just be careful when we eventually terminate the instances we create, later on in the article.
If it’s your first time using AWS, make sure you sign up first, in order to take advantage of their generous free-tier option.
Let’s get started.
What is the AWS Command Line Interface?
First things first, what exactly is the AWS Command Line Interface?
Simply put, it’s a tool that Amazon offers to interact with AWS Services (more on it here). It’s extremely deep, has an absolute plethora of commands and parameters, and for bonus points, it’s got great documentation. It really is quite an amazing tool, and it’s very powerful. As a result, it’s worth becoming well acquainted with it, and that’s what we’re going to do!
Installing the AWS Command Line Interface
Let’s get started by opening up a terminal. I’ll be running through this on Ubuntu 18.04, so let’s make use of the always handy Ctrl + Alt + T shortcut and a nice clean terminal should pop-up on our screen.
Installing pip
Although we can install the tool from Ubuntu’s package repository, or install it as a Snap, Amazon recommends using Python’s pip package manager, as that way we ensure we are running the latest and greatest version of it. So, that’s what we are going to do.
Python 3 is installed by default on Ubuntu 18.04, so we don’t need to worry about that. Let’s go ahead and run the following commands in the terminal to update the repositories and then install pip.
sudo apt update
sudo apt install -y python3-pip
All being well, pip is now installed. Easy, right? Let’s move on and install the Command Line Interface itself.
Using pip to Install the AWS Command Line Interface
This is really simple, and it couldn’t be easier. If you’re a good typist you could do it with your eyes closed!
In the terminal let’s type out the following command to install the AWS CLI tool.
pip3 install awscli --upgrade --user
We shouldn’t need to run it as sudo as the --user parameter tells pip to install it to .local/bin within the home directory. Additionally, as it’s installed to that directory we won’t need to update our path, as Ubuntu includes .local/bin on the path already in the .profile file, as you can see from the excerpt below.
# set PATH so it includes user's private bin if it exists
if [ -d "$HOME/.local/bin" ] ; then
    PATH="$HOME/.local/bin:$PATH"
fi
All we need to do then is reload our bash profile. To do this just run the below in the terminal, from the home directory.
source .profile
Once that’s done, let’s call the tool and see if it’s working. In the terminal type in aws --version, and if you’ve followed along correctly so far, you’ll see a line detailing the current version of the tool, like the line below.
aws-cli/1.16.146 Python/3.7.3 Linux/5.0.0-13-generic botocore/1.12.136
So it’s working properly. The next thing we need to do is enable tab completion.
Setting up Tab Completion
The AWS Command Line Interface has a huge amount of commands and parameters, typing those out manually would be great if you’re trying to remember them, but not great for convenience! So, it’s well worth turning on tab completion and getting a helping hand, almost literally!
As we know from earlier, pip has installed the CLI into ~/.local/bin. Within that directory there will be a script called aws_completer, this script is what we are after and will enable the magic of tab completion!
We need to add the below line to our profile to ensure tab completion is enabled each time a new shell is created. So append the below to .bashrc.
# enable aws tab completion
complete -C '~/.local/bin/aws_completer' aws
Then we just need to reload our bash profile.
source .bashrc
Let’s go ahead and give it a try to see if it’s working as we expect? If it is, when we press tab, we’ll see commands complete, or we’ll see a list of possible suggestions based on what we have typed so far.
It should work just like this:

Right, that looks good, so let’s move on.
Configuring the AWS Command Line Interface
We need to configure the AWS Command Line Interface to work with an AWS account in order to get any actual use from the tool.
To do that we need to create an IAM user with the correct rights. For now, we’ll have to do this on the AWS website, as we haven’t yet finished setting up the CLI tool, but in the future it’s possible to do it with the CLI tool.
Creating an IAM User Account
Login to the AWS Management Console.
Click on Services and then under Security, Identity, & Compliance select IAM.
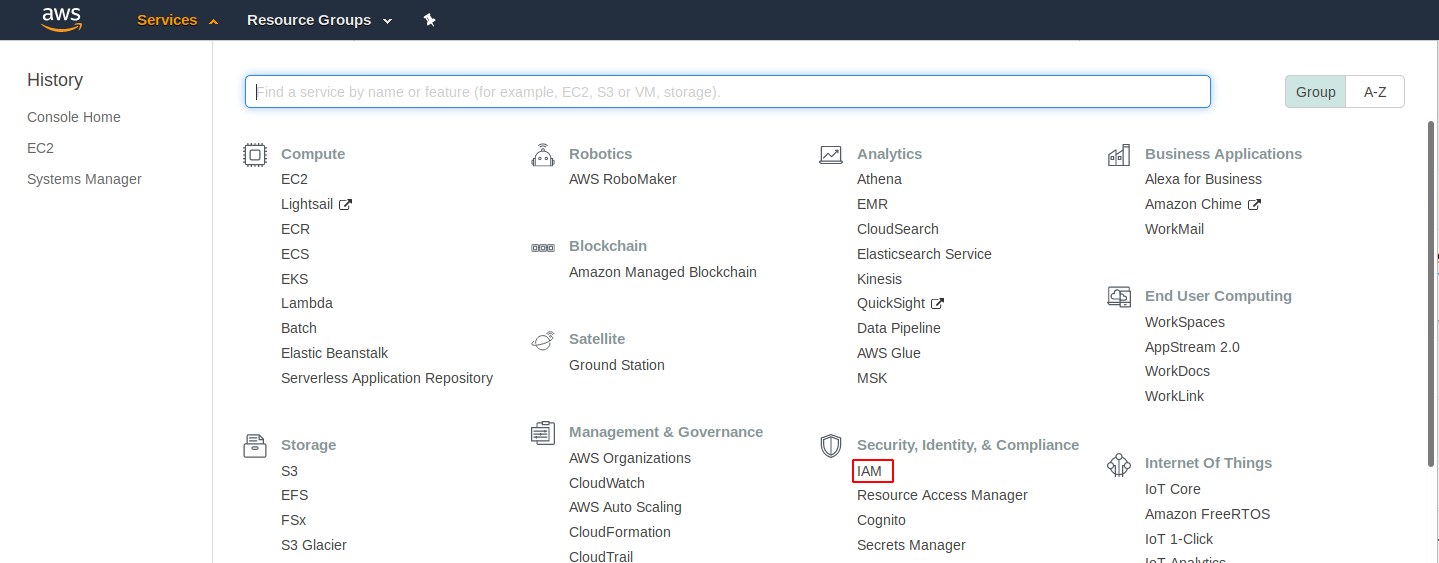
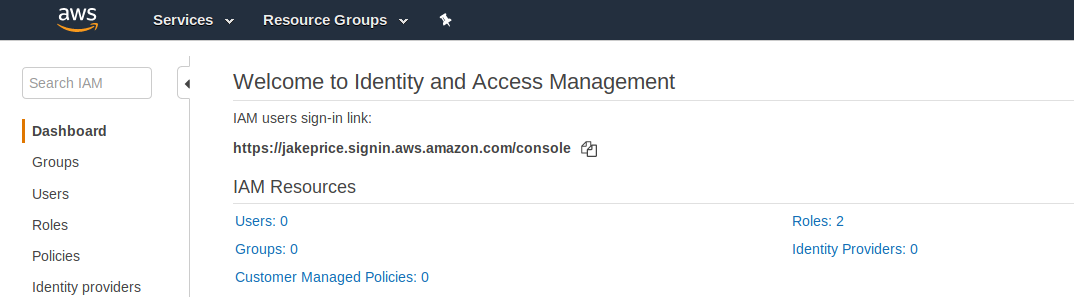
We’re now on the Identity and Access Management dashboard. This will give an overview of any current IAM Users and Policies.
Click on Users on the left-hand menu.
Then we need to click Add user.
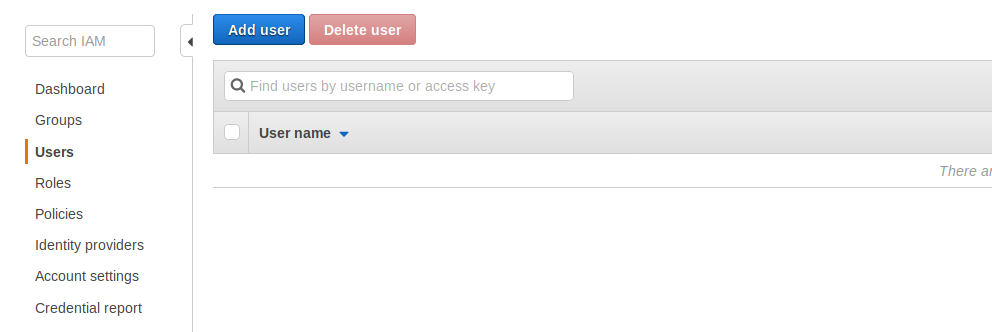
We’ll now run through the Add user wizard.
Let’s give the user a User name and then under Select AWS access type select Programmatic access.
This will give us an access key ID and a secret access key which we can use with the AWS Command Line Interface.
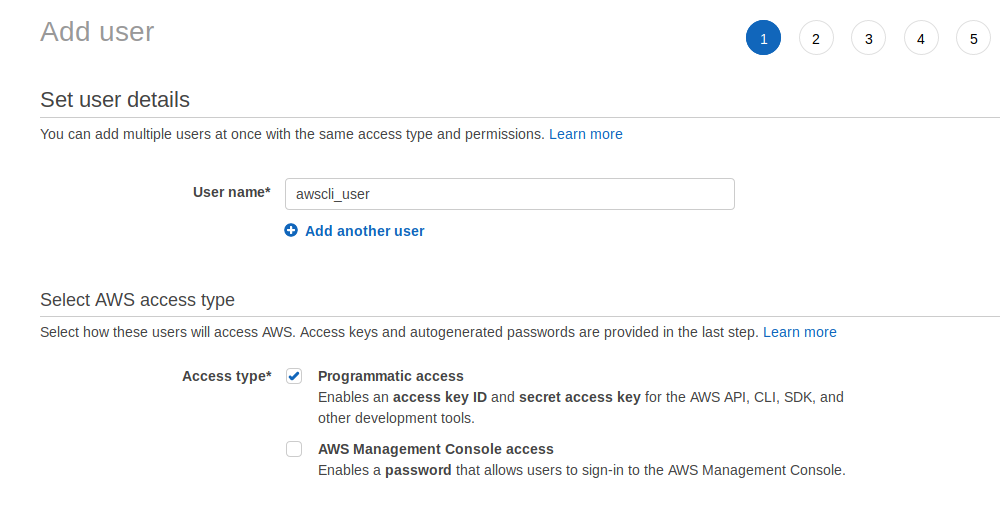
Click Next.
Under Set permissions click Add user to group and then in the blue box click Create group.
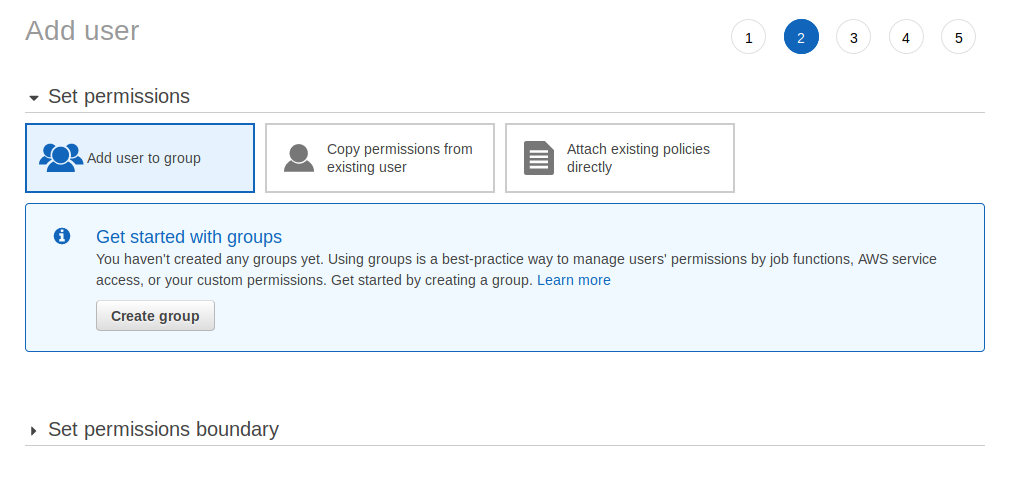
A window will pop up to select a group. Give the group a name related to the purpose the group will be used for, and then in the search box labeled Filter policies type ec2 and tick the checkbox for AmazonEC2FullAccess, we can then click Create group.
This is going to give the IAM user full access to EC2, allowing us to fully manage any instances via the CLI tool.

Make sure the group is ticked (it should be by default) and then we can click Next.

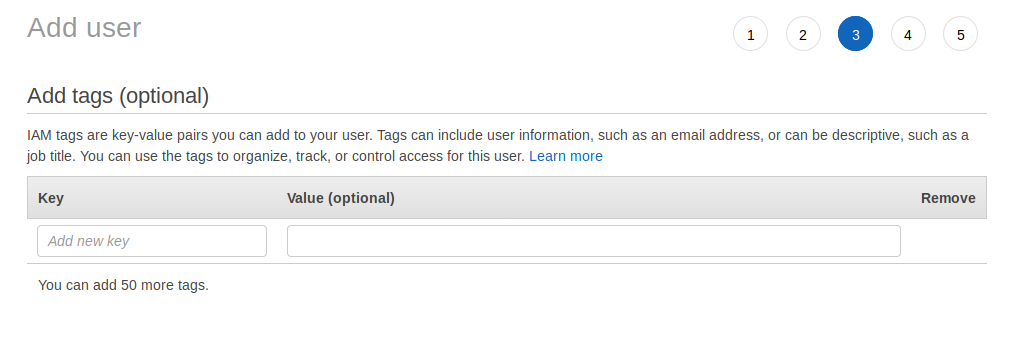
We don’t need to add any tags, so click Next again.
Let’s review the details to make sure we’re happy to proceed with creating the user. Then click Create user.
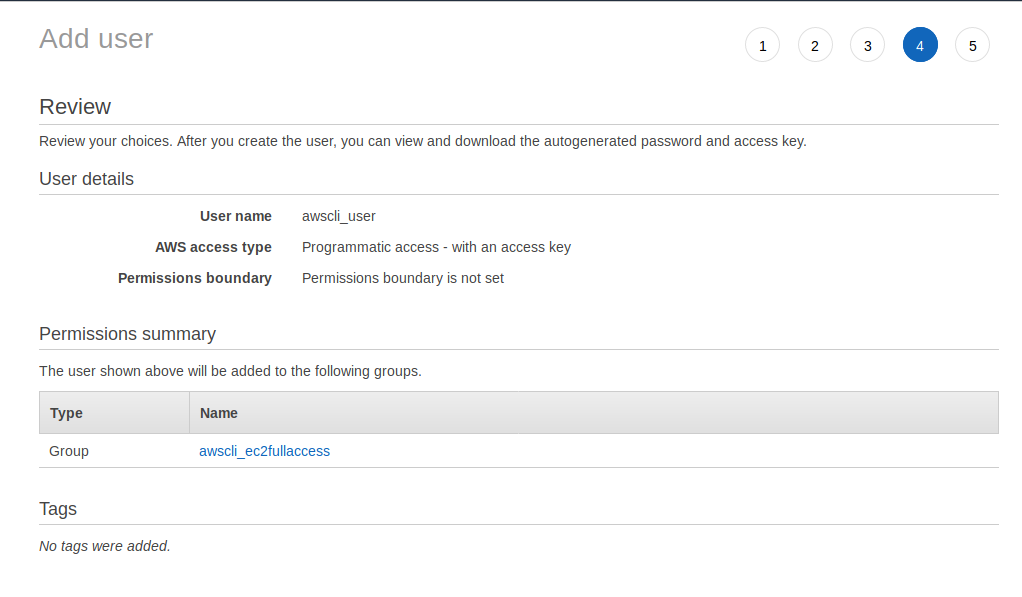
All being well we will get a Success box and the user details will be shown on the screen, we’ll need the access key ID and the secret, so click on Show under Secret access key.

Configuring the AWS CLI to use our IAM user
We’re finally ready to start using the AWS Command Line Interface, we just need to configure it to use the newly created IAM user.
In the terminal, type the following.
aws configure
We’ll then be asked for a few things. We’ll need to provide the Access key ID and Secret access key for the IAM user, as well as a default region. I’ll be using the EU (London) region, which has a region code of eu-west-2 but use whichever region is closest, there is a list of available regions here.
AWS Access Key ID [None]:  AKIARSEPPSJJYYJ7OI42
AWS Secret Access Key [None]: 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
Default region name [None]: eu-west-2
Default output format [None]: *Just press enter here*
Good news, that’s it, we can now go ahead and create an instance via the CLI tool. Woohoo!
Launching an EC2 Instance using the AWS Command Line Interface
So before we launch our instance, we need to create an SSH key pair and a security group.
Creating an SSH Key Pair
We’re going to make use of the AWS CLI create-key-pair command to create a key pair.
If we run the command below, this will send the key contents to a file in the .ssh folder in the home directory. This is preferred as otherwise, we’ll get an output in JSON, and we would have to manually copy and paste the key into a file ourselves. Let’s make the shell do the grunt work instead!
aws ec2 create-key-pair --key-name awscli-testkey --query 'KeyMaterial' --output text > .ssh/awscli-testkey.pem
If we have a look at the key file with cat .ssh/awscli-testkey we should see a nicely formatted private SSH key like the one below.
-----BEGIN RSA PRIVATE KEY-----
MIIEogIBAAKCAQEAoFpUid/OJ/Gslm2XJxEdD3EQQay2IdEdQRul2+LUsClBQiPR6RgOr0+S1bfc
D0jlCeKwPSbQUBf9reyYhIy9cAxXILn6UzHKSQ3mr1p8vDSLREH9TM+N0xRk01VgkjMH2ABmmrGW
dMLDcYagOt+zCCiEM6A/uZevYbsuNegSEv5Fp8bi/y2jyAr+fohfVsFOYduOoXDIMlj/UcoSMEyI
GwipLEqVkSlDj3LJTJxSD/Mw2fICws70J6SIbj/FPVNFoBkfbZmDPYn4yb/nHfGRFY67zo/xTFs0
76gtWH4lz5fyjFBwtaBSnne4t+u3uDGEuwBMwsUxYK8gFVSVYbEf0wIDAQABAoIBAClk6CnnYnqh
QqJajAiDvHK+BypNAX9dUiX6kyheN/V50OTYBlob4b6T1h3hpqczdBzHLiO7H09twgjh6MVe55BD
P0Ktf9d2JPgS5Jgjzctv7Puj5VWsxrnUq+p6QcG79qxl/ha0/VgK5xUpYbeRA9B5VRdWqNyqMZYT
EezMic3o99Ul6ZvFPwITG2QMTXnN3HwDmuajETLckN9mxUjP6rZlThGwNaMQnyU0cOh9/yIJ1Zy0
T/OW2ozK1imwRsf+jfHiykpUj9/UvQVe5zcixr9r0X5fH/HXEFqmzBumv1apXjtUAJyGKsb0CoDk
f6SVaOf2R5r8N9QUVA6Gqmc0OnECgYEA72o/WgsJ0L0LmuqGT8JUMYqugsJVH2zjQcSZ3M40JARb
LF3jDcI0gH43V4/ruf39+eQO4gI6mP7GbDjffvXKaF+fFjwVVJRh/GL+DpZhsZVIoKX1HWqBgcb5
c7PJjsyHKScDS48YtQxh9ZPoSEkaxBLANWsJfL2ReXF5R6k1KX8CgYEAq3YBValgOAM/lhIXSGnL
eGPPRpwLWYMQqfiwqs/23bae5LduG6B/Xb9QmMsU5LJ2JJzSkFXy1kcE/AfDG8FD1XeqmzqNYRqy
L+DPwhqFtMvNpJz1heDWIDP700zWUaBdfdEgiZZnD/r/Ih/C57cpMNqfEKKja//+FXuYWK2Ua60C
gYAy3bwAAYBgXQnuLA3FPGBu9iwFlAxJ1PSjsIWQKC9jx5knX/sxnSVSd36CmA1ZQuGHCjEvS5Hv
l5HIxHyXmNkcO9StAK73fV8kJFQd/U1cUX9QwnHFgi9px0CQmI4mTMYatDM7BngVX0Ag0P/0+7M4
HVPBBbDKU+xohPdjhkvJOQKBgFAcseDxY6ioM+SNjV1jOROGJwnJzS/EoluYfAtDYggT1MfuwL6d
zgTiZ+kMMjXtAHB46ZVQ40alJjoP8mScd3JdGFSxFe/CBnGCa/A4bjKcavg38ivcco/XWhlPNHAt
KqGnvbkrkfoQf3bVOj8EAHX4IAwowYyrrm8hMXx1lfx9AoGAIqenyoQMpnXvMgmmYfEC6gbDXPFh
qE1dZXW6AYnzB5b3jHr/8fs+DG3AMMsjpo55jh11JyahCNDlu7nwmjWEc5cI72hxxwfPSyQvTidz
TJA+LTi1xASBAXZfMj8iKSF6/oCfCuNC9Uj0zf79OUDY1sSuI8o7otJY6nrITgsTCkI=
-----END RSA PRIVATE KEY-----
Updating the file permissions on the private SSH key
One last thing we should do is change the file permissions that are set on the private key so that only we can read it. AWS won’t let us SSH into an instance if the key’s permissions are too “loose”, and they will be after saving it.
We’ll receive a warning like the below when we try to connect over SSH. Despite the warning’s scary appearance it won’t bite and is easily rectified!
@@@@@@@@@@@@@@@@@@@@@@@@@@@@@@@@@@@@@@@@@@@@@@@@@@@@@@@@@@@
@         WARNING: UNPROTECTED PRIVATE KEY FILE!          @
@@@@@@@@@@@@@@@@@@@@@@@@@@@@@@@@@@@@@@@@@@@@@@@@@@@@@@@@@@@
Permissions 0644 for '.ssh/awscli-testkey.pem' are too open.
It is required that your private key files are NOT accessible by others.
This private key will be ignored.
Load key ".ssh/awscli-testkey.pem": bad permissions
If we check the permissions on the private key, we’ll see what the problem is. We can read and write to it, which is fine, but our group and other users can also read it, and AWS doesn’t like that one bit!
-rw-r--r-- 1 jake jake 1671 Apr 29 14:23 awscli-testkey.pem
So, all we need to do is the following in the terminal. Really easy.
chmod 400 .ssh/awscli-testkey.pem
Now if we check the permissions, we’ll see that we’re the only person that can read the file, and nobody else can. We can’t even write to it unless we give ourselves write permission.
-r-------- 1 jake jake 1671 Apr 29 14:23 awscli-testkey.pem
Creating an EC2 Security Group for our Instance to use
Now it’s time to create a security group for our instance to use. If we don’t specify one AWS will launch it into the default security group, but for the purpose of getting more familiar with what we can do with the AWS CLI we’ll create one to use, and then add a rule.
Let’s type the following into the terminal.
aws ec2 create-security-group --description "Test Group for AWS CLI" --group-name testawscli-securitygroup
All being well we’ll be returned with some JSON output which will give us the GroupID, which we’ll need shortly.
{
    "GroupId": "sg-083726f46cfdca0e5"
}
The security group has been created but it’s useless to us if it blocks us from accessing our instance, so we’ll need to create a rule to allow inbound connections from SSH.
As mentioned above, we need to use the GroupId from the JSON output.
Let’s type the below into our terminal and put the GroupId in.
aws ec2 authorize-security-group-ingress --group-id sg-083726f46cfdca0e5 --protocol tcp --port 22 --cidr 0.0.0.0/0
You won’t receive any output after running this, but if you want to double check you can have a look on the web console, where we can see that the rule has been added.

Finding an Amazon Machine Image (AMI) to use
We’re almost ready to launch an instance, but we need to find an AMI to use.
We’re going to be using Ubuntu 18.04 Server, but we need to find the AMI ID of an official Ubuntu image. To do this let’s hop over to Ubuntu’s Amazon EC2 AMI Locator.
Scroll down towards the bottom of the page. For some reason Ubuntu puts it’s table filters right down there! We need to go through each column and set the corresponding filter. As you can see from the below image, I’ve gone with the following:
- Column 1 =
eu-west-2(select the region you are using) - Column 3 =
18.04 LTS - Column 4 =
amd64 - Column 5 =
hvm:ebs-ssd

This will filter the table down to the latest official Ubuntu AMI. Let’s copy the AMI-ID in column 7, as we’ll need that next.
Launching instances
We’re finally ready to launch an instance, and I’m so excited we’re going to launch 2!
So let’s get on with it. If you’ve forgotten your key name or security group just run aws ec2 describe-key-pairs and/or aws ec2 describe-security-groups for a JSON output of the details you’ll need to use.
We can see the parameters we are using are really clear to understand, so I won’t explain what they are doing as it’s obvious.
aws ec2 run-instances --image-id ami-068f09e337d7da0c4 --count 2 --instance-type t2.micro --key-name awscli-testkey --security-groups testawscli-securitygroup
All being well, we’ll receive a long old JSON output which will describe the instances that we’ve just created. It’s a long old output so I won’t copy it below, but if we had done something wrong we would get an error that will read something like the below. So it should be obvious if there is an issue.
An error occurred (InvalidParameterValue) when calling the RunInstances operation: Value () for parameter groupId is invalid. The value cannot be empty
Checking the status of our instances
Leave it a few minutes and then we’ll run a quick command to take a look at the newly created instances.
aws ec2 describe-instances --query "Reservations[*].Instances[*].[PublicIpAddress,InstanceType,State.Name]"
This will output some information about the instances in JSON. Not particuarly pretty, but it tells us what we need to know.
[
    [
        [
            "3.8.170.161",
            "t2.micro",
            "running"
        ],
        [
            "3.8.48.144",
            "t2.micro",
            "running"
        ]
    ]
]
We can double check what we’re seeing is correct by looking at the web dashboard if we ever feel the need too.

The output of commands that run using the AWS CLI can be altered. This means we can do some cool things to the data before it’s displayed on the terminal.
For instance, if we type out the below command, then we can see an overview of any running instances in an easy to read table format. If we change --output to text we would see the same, but in text only, which also means we could then output that to a CSV file or something. Very cool!
# show all ec2 instances in a table format
aws ec2 describe-instances --query "Reservations[*].Instances[*].[PublicIpAddress,PrivateIpAddress,InstanceType,Placement.AvailabilityZone,State.Name,InstanceId]" --output table

# export all ec2 instance information to a csv file
aws ec2 describe-instances --query "Reservations[*].Instances[*].[PublicIpAddress,PrivateIpAddress,InstanceType,Placement.AvailabilityZone,State.Name,InstanceId]" --output text > aws_instances.csv

Connecting to an Instance over SSH
Let’s make sure the SSH key we created and specified for the instances we launched is working, and whilst doing that we’ll also see if we’ve configured the security group correctly to allow us to gain access over SSH.
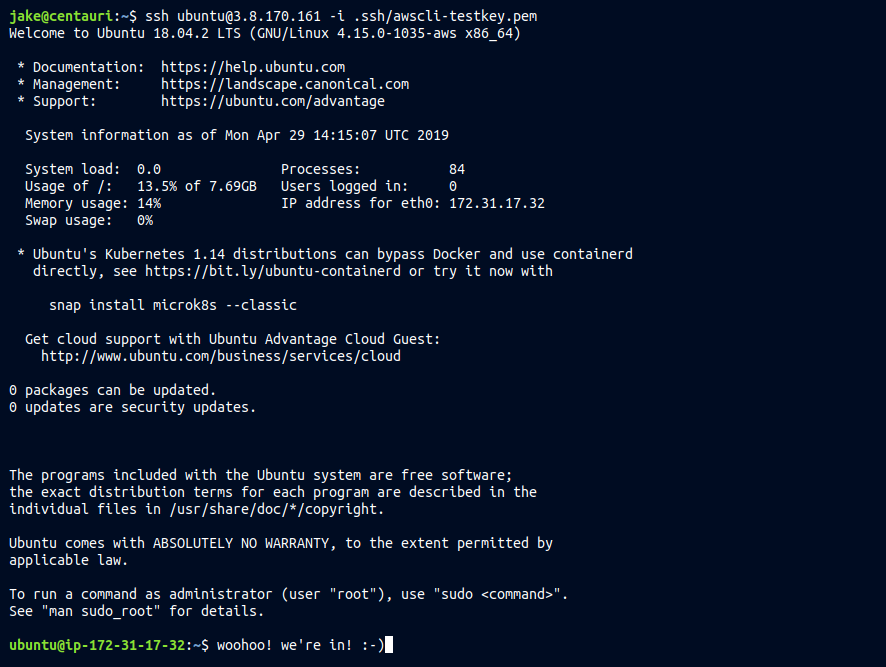
Using the command we ran above to display information about the instances, let’s get the IP address from it and connect to one of the instances (make sure you use the IP address of your instances, not mine - you won’t get in otherwise!).
ssh ubuntu@3.8.170.161 -i .ssh/awscli-testkey.pem
And… Boom! We’re in!
Terminating EC2 Instances using the AWS Command Line Interface
We should probably go ahead and delete these instances now, so we don’t get billed big time. There’s nothing worse than forgetting about some instances you spun up, only to be reminded at the end of the month with a big bill. You’ll only make that mistake once!
We’ll be using AWS CLI’s terminate-instances command, and then we’ll have to provide the instance-ids of the instances we want to terminate, which we can get from the describe-instances commands we were playing with up above.
All we have to do is simply type out the below, and include any Instance ID’s that we want to terminate.
aws ec2 terminate-instances --instance-ids i-047b6811d7907f71c i-08d7e54edcb39b4d2
Check back in a minute or two and the status should show as “terminated”.
aws ec2 describe-instances --query "Reservations[*].Instances[*].[PublicIpAddress,PrivateIpAddress,InstanceType,Placement.AvailabilityZone,State.Name,InstanceId]" --output table
As we can see the status of both instances is now final… They’ve been TERMINATED!

If we check the EC2 Instances Dashboard we’ll see it’s not lying!

Summing it all up
I hope you’ve got a glimpse of how powerful the AWS Command Line Interface can be, and some of the cools things that can be done with it.
Thanks for following along, and feel free to comment.