Amazon has a way with names. I don’t know if they do it on purpose (for a laugh) but AWS has some crackers! Names for services such as “Elastic Beanstalk”, “Amazon Sumerian”, “Ground Station”, and “AWS Glue”. Although they don’t give you much of a hint as to what they actually do, they sure do get a laugh out of me!
So when we come across “S3” what are we supposed to think? What an earth is it? Does it stand for something?
Apparently so! It stands for Simple Storage Service, so maybe that’s where the S3 comes from (3 words beginning with an S?) Who knows!? What does it do is the important question.
In the words of Amazon:
Amazon Simple Storage Service is storage for the Internet. It is designed to make web-scale computing easier for developers.
https://docs.aws.amazon.com/AmazonS3/latest/dev/Welcome.html
So S3 is simply put, flexible and scalable internet storage. Made for hosting data you want to access quickly and cheaply without having to manage the physical storage infrastructure yourself.
You can store any data you like on S3, as much of it as you like, and you can retrieve it easily at any time. At it’s most basic level it’s simply cloud storage offered by Amazon, but it’s designed to be more powerful than that. The point of S3, despite it offering a GUI, is to make use of the S3 API. Whether directly or through tools designed to work with it. For instance, I use rclone, connected to an S3 bucket to backup this blog.
What is an S3 bucket then? Think of it as a container (not the Docker type), or if you like, use the very word Amazon uses, a bucket. The easiest way to understand it is if you think of it as just a directory, in which you can have multiple sub-directories and store data in it however you see fit. There really is nothing complex about it.
To become more familiar with the things you can do with an S3 bucket it can be handy to run through creating one using the GUI, so if you’re interested follow along below.
Getting started with Amazon S3
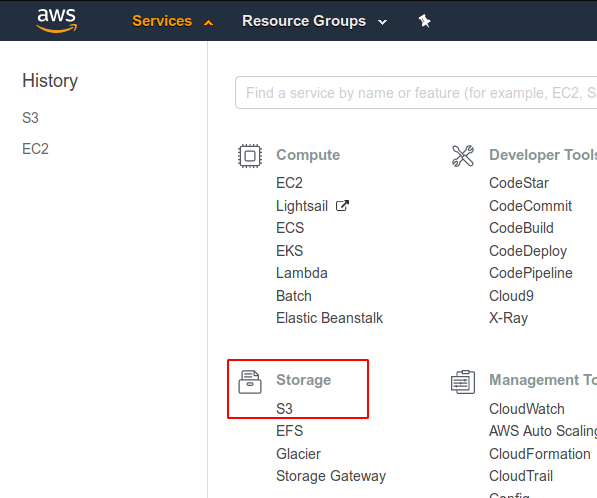
From the main console, select Services and under the Storage collection click on S3.
Creating a Bucket
You’ll arrive at the S3 overview screen, which will show you any buckets currently in use. If this is your first time interacting with S3 buckets, there obviously won’t be any.
Lets click on Create bucket to start the bucket creation wizard.

The Create bucket wizard window will now pop up.
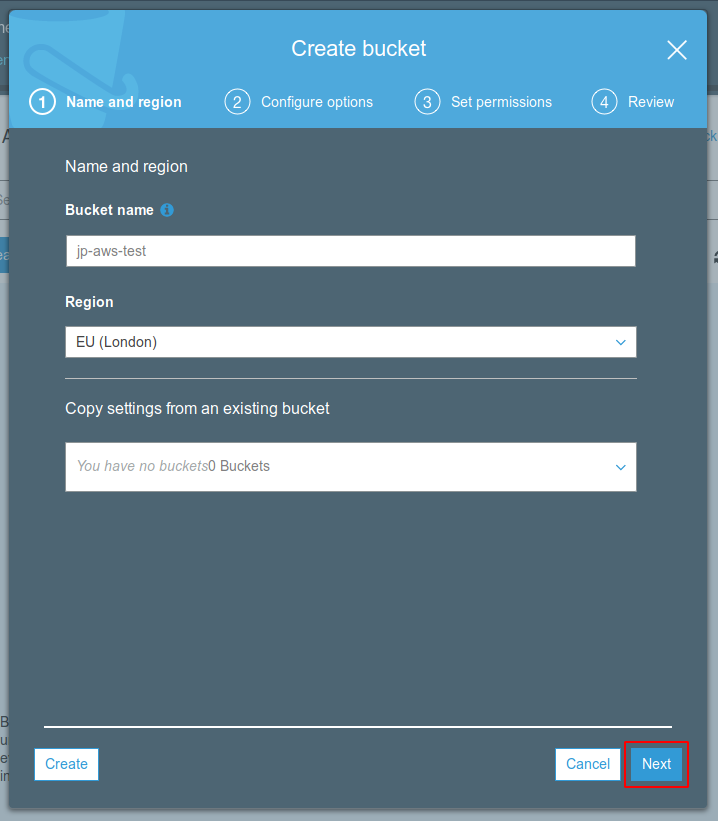
Giving your Bucket a Name and Location
Let’s give our bucket a name and select a Region. (Your default region should be automatically selected.)
Note: When creating a bucket you may actually use make sure you pick a name you are happy with as you won’t be able to rename it in the future.
When you’re happy with your super original, totally creative name… click Next.
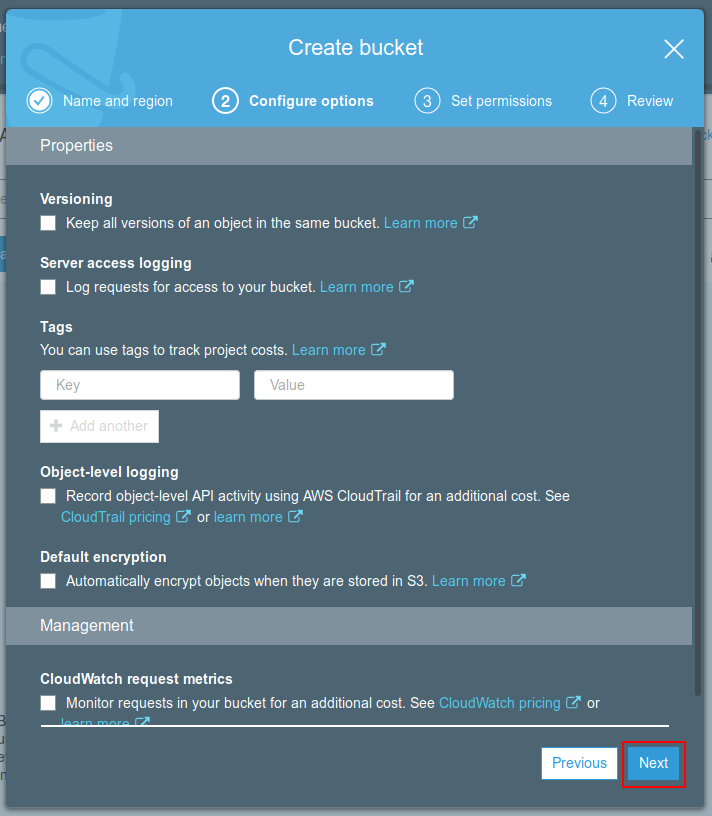
Bucket Configuration Options
Moving on to the properties configuration for our bucket, you will notice that there are a few options to choose from. They should all be pretty self-explanatory. They can all be turned on afterwards if you are not sure now or change your mind in the future. I’d suggest you click on the Learn more link for each and become familiar with what they do if you are not sure.
For now we won’t be selecting any, so we can just click Next to move on.
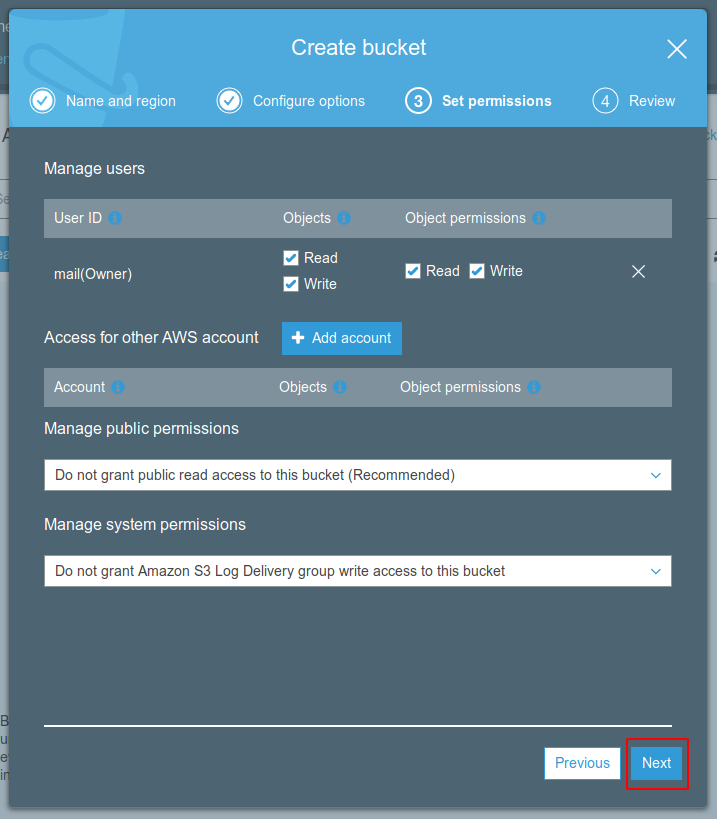
Bucket Permissions
Time to set our bucket’s permissions. As the creator you will have full read and write access, but you can add other accounts if you need to by clicking Add account. If you are using S3 for real you would setup IAM users with permissions limited only to this bucket etc, which is good security practice, but for now we’ll just accept the defaults.
Leave the next two settings as they are (Manage public permissions and Manage system permissions). It should be pretty obvious what they do as the drop-down options for each are pretty self-explanatory, but if there’s any doubt, by default your bucket won’t be publicly accessible and logs won’t be written to your bucket.
When you are happy to move on, click Next.
Review your Bucket’s Settings
Have a glance through the configured settings overview and make sure you are happy with the options you have selected.
When you are happy to move on it’s time to finalise the creation of the bucket, by clicking on Create bucket.

S3 Bucket Overview
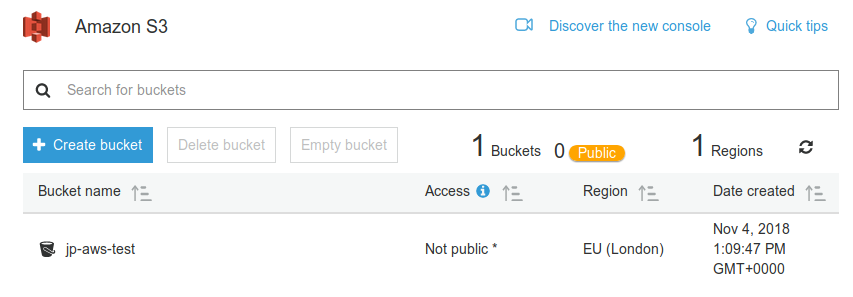
We’ll now be back at the Amazon S3 overview page, and be able to see our newly created S3 bucket_._
Notice that two of the columns give us a quick overview of our Access policy and what Region our bucket is in. Handy if you have a lot of buckets.
That’s it… Simple as that. Although a simple post, hopefully it’s served as a basic introduction to Amazon S3. Though you can do some complicated things with S3, the core purpose of the service is simple enough.
With that process in mind you will have more of an idea of what you are doing when you are creating and managing them using the API. I’ll be sure to post something about that in the future.
Thanks for following along.