We live in an age where we can get our groceries, read our books, stream our boxsets, and a whole host of other things all from the same company. That same company dominates the “cloud” and lets us host whatever internet service or application we could possibly think of as well. For better or worse, you truly can do everything on Amazon. I don’t know whether that’s scary or impressive? Probably a bit of both!
Their cloud service is called AWS (Amazon Web Services) and for many, it’s their go-to cloud provider. It has about 33% of the ever-growing cloud market and although Microsoft and Google are getting closer, Amazon remains the market leader, for now.
Amazon is kind enough (you could also argue rich enough) to offer a free-tier with AWS. Unfortunately, they don’t do the best job of explaining some of the limits, but nevertheless, the free-tier offers a fantastic entry point for learning the ropes.
The Free Tier website is a little bit overwhelming and at the same time manages to be relatively scant on the important details! If you dig in, you realise that unless you’re careful you could still easily end up being charged a significant amount of money if you go over the limits of the free tier. That means it’s vital you do your research beforehand and set up billing alerts, and/or budget controls to avoid big bills.
Getting to grips with the Free Tier.
We get a good number of options to play with on AWS’ Free Tier.
In Amazon’s own words:
The AWS Free Tier enables you to gain free, hands-on experience with the AWS platform, products, and services.
https://aws.amazon.com/free/
I’m going to be running through how to create an Amazon EC2 (Elastic Compute Cloud) instance, in other words, a virtual machine!
We get 750 hours per month for 12 months, after that you have to pay. So it’s ideal for learning the ropes, especially if you make use of the other Free Tier options as well.
Once you’ve gone through the sign-up process, follow along below.
Creating an Amazon EC2 Instance
After logging into the AWS console you should change your location in the top right corner to a location closer to home. There’s a lot of locations, all around the world, but I’m in the UK so I’ll be going with EU (London).

I never like to take shortcuts when I’m learning something, so we’ll go the long way around.
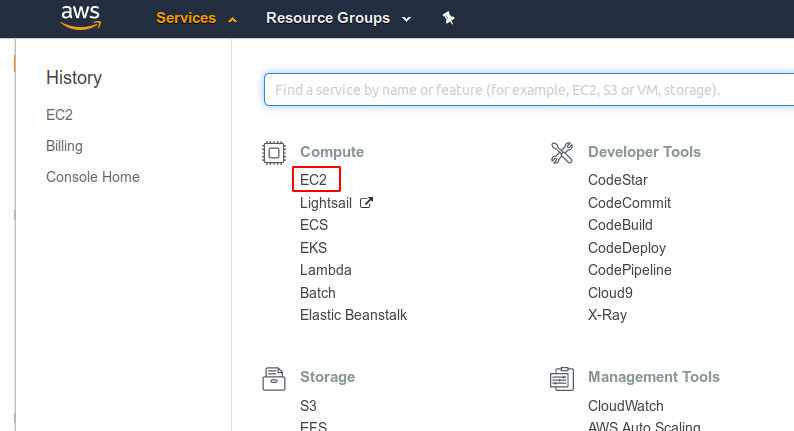
Select Services on the top bar menu and under Compute select EC2.
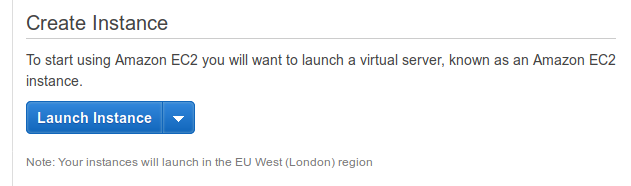
On the EC2 Dashboard you’ll see an overview of your currently non-existent EC2 resources. We want to click the blue Launch Instance button towards the middle of the page.
Choosing an Amazon Machine Image
It’s now time to choose our AMI a fancy name for a virtual machine image.
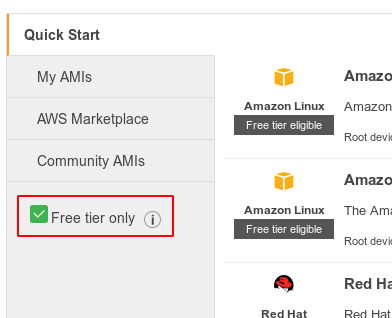
It’s not that important because it’s clear which images are the Free tier only images as they are labeled, but it can’t hurt to ensure you check the Free tier only checkbox to ensure you only see eligible images.
Be sure to have a look under the AWS Marketplace tab, there are hundreds of options to choose from. Although we’re not going to choose any of these, it’s still interesting to see some of the options available on AWS, such as firewall images and much more.
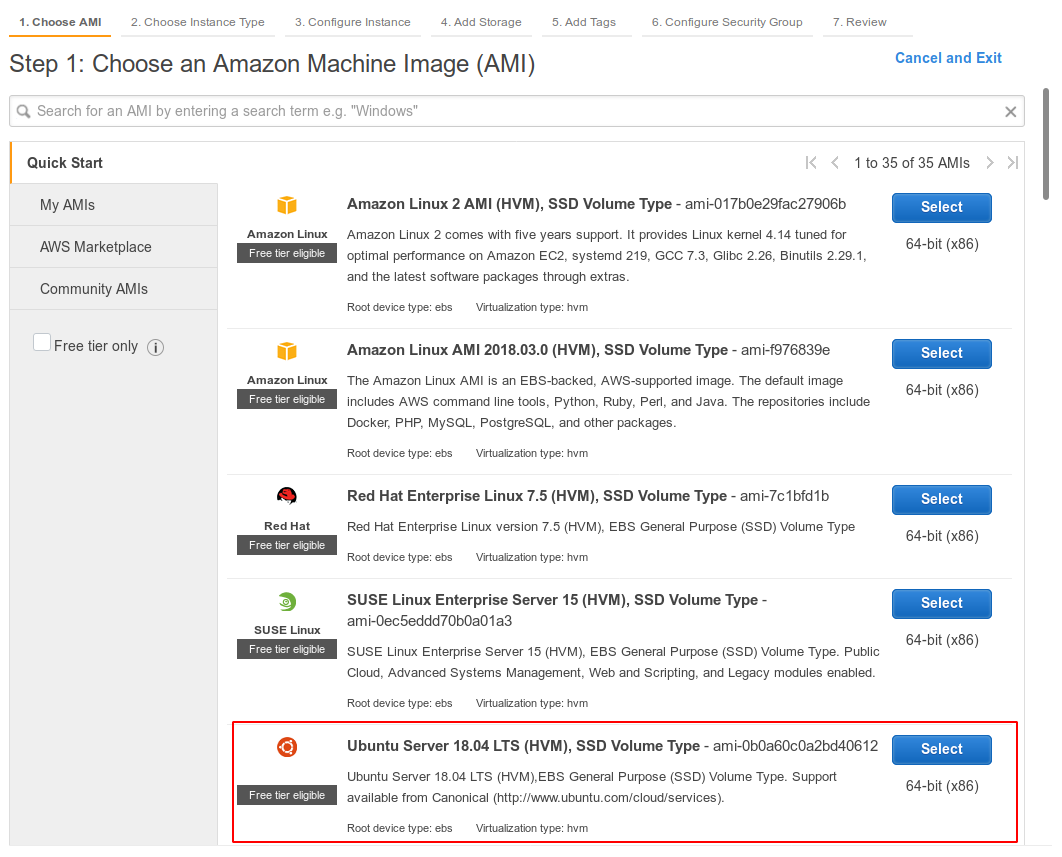
Make sure you are on the Quick Start tab. We will be launching an instance running Ubuntu 18.04 LTS. So find Ubuntu in the list and then click Select on the far right.
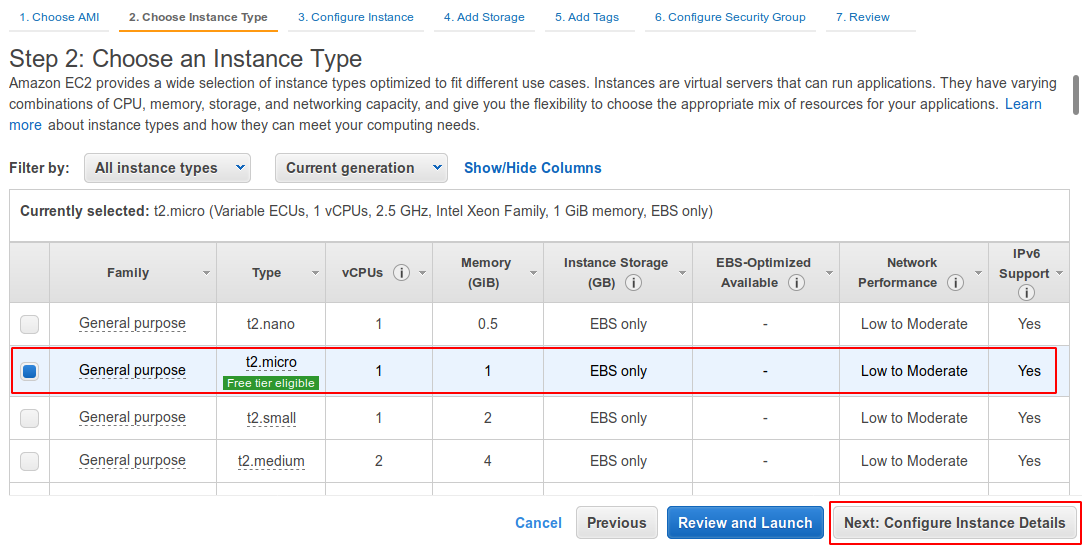
Choosing the Instance Type
Now we will be faced with a long list of Instance Types. Simply put that’s the spec of virtual machine we want to use. We need to select one that is free tier eligible, and thankfully to make things easier it’s clearly labeled and already selected.
We’ll be spinning up the t2.micro instance, which has 1 vCPU and 1 GiB of memory.
Once you are happy to move on, click Next: Configure Instance Details.
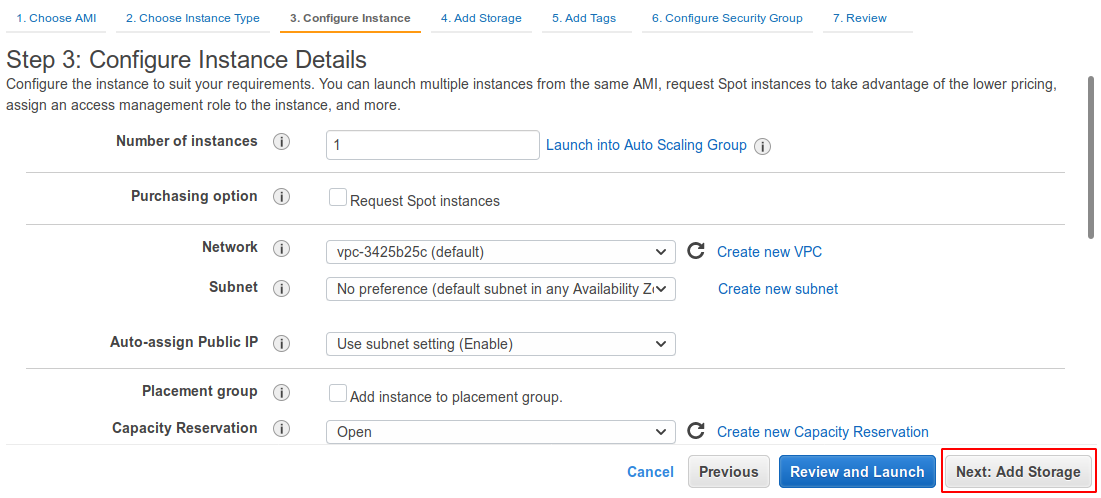
Configuring Instance Details
We’re not going to configure anything about our instance here, so we can just accept the defaults, but it’s helpful to see what’s going on behind the scenes, so make sure you hover over the i icon for more information on each parameter. When you’re happy to move on click Next: Add Storage.
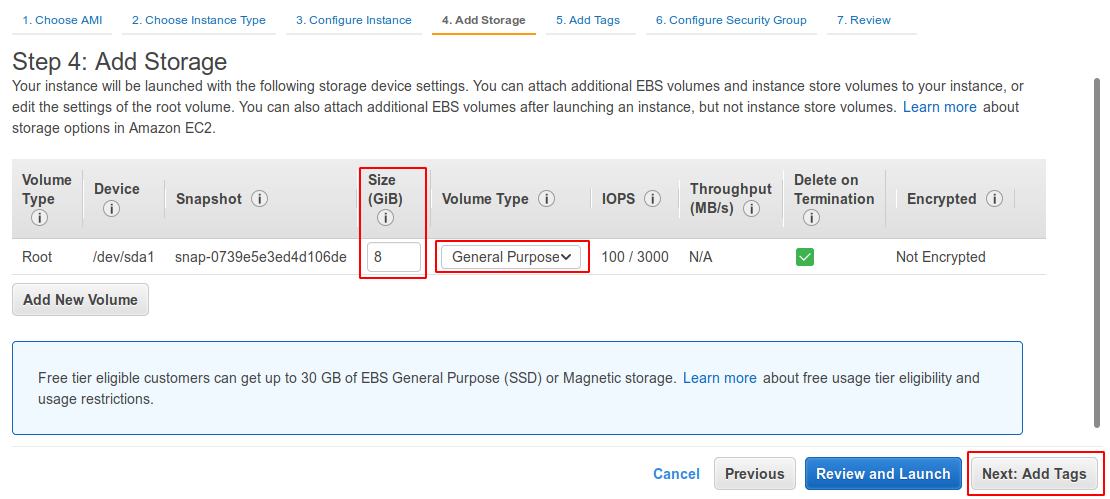
Configuring Storage
For now, we’ll just go with the default 8 GiB for our instance storage. We’ll also leave General Purpose SSD (gp2) selected under Volume Type. Once you are happy, click Next: Add Tags.
IMPORTANT TO NOTE:
You get up to 30 GB of free storage on the free-tier but notice that the size is inGiB - Gibibyteand notGB - Gigabyte, so be careful. If you put30 GiBin, thinking that’s30 GB, it’s not! It’s actually32 GB, and you’d go over your free-tier limits. You might want to make use of a GiB to GB converter to ensure you input an amount that isn’t going to tip you over the limits.
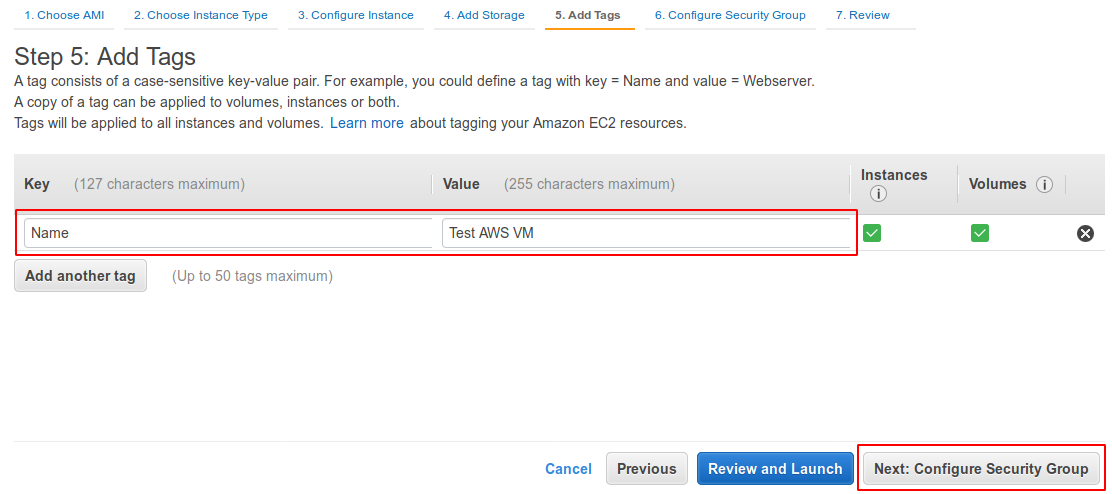
Tagging an Instance
What are tags? Amazon says:
A tag consists of a case-sensitive key-value pair. For example, you could define a tag with key = Name and value = Web server.
So, for now, we’ll just click the Click to add a Name tag and go with that, you can then pop any name you want in the Value field. I’ll just type Test AWS VM.
I can imagine this would be much more useful when working with lots of instances. So feel free to just skip this step entirely. We can now move on, so click Next: Configure Security Group
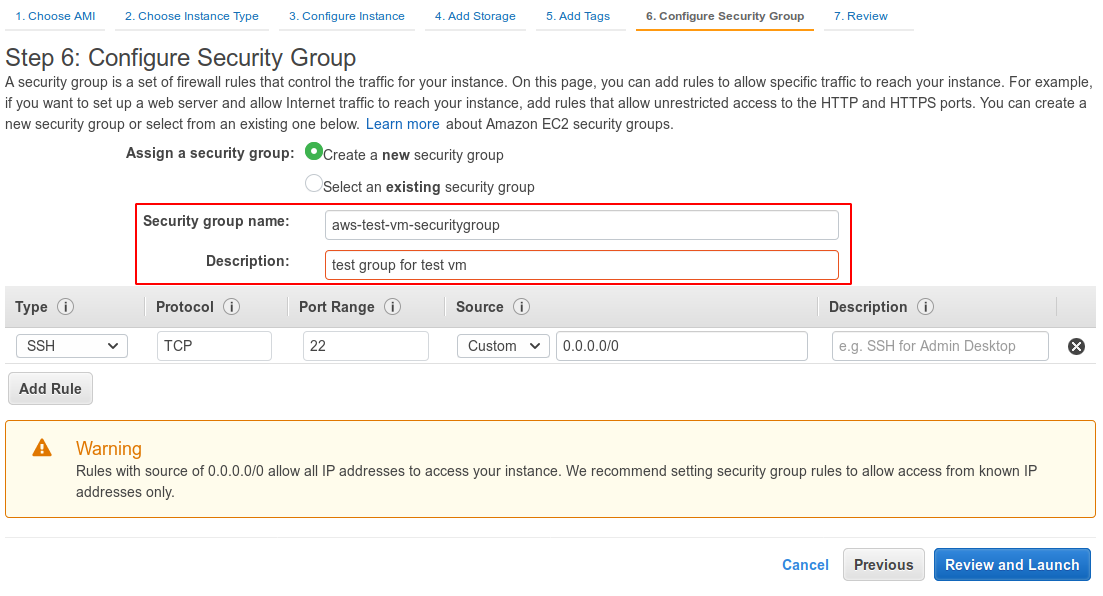
Configuring a Security Group
This area allows us to configure some firewall rules to control the traffic to our instance. By default, our instance will be publicly accessible by anyone, and for security, you may wish to lock it down to be accessible to specific IP addresses only.
We are just going to go with the defaults for now.
Let’s give our security group a name and a description. Then we can click Review and Launch.
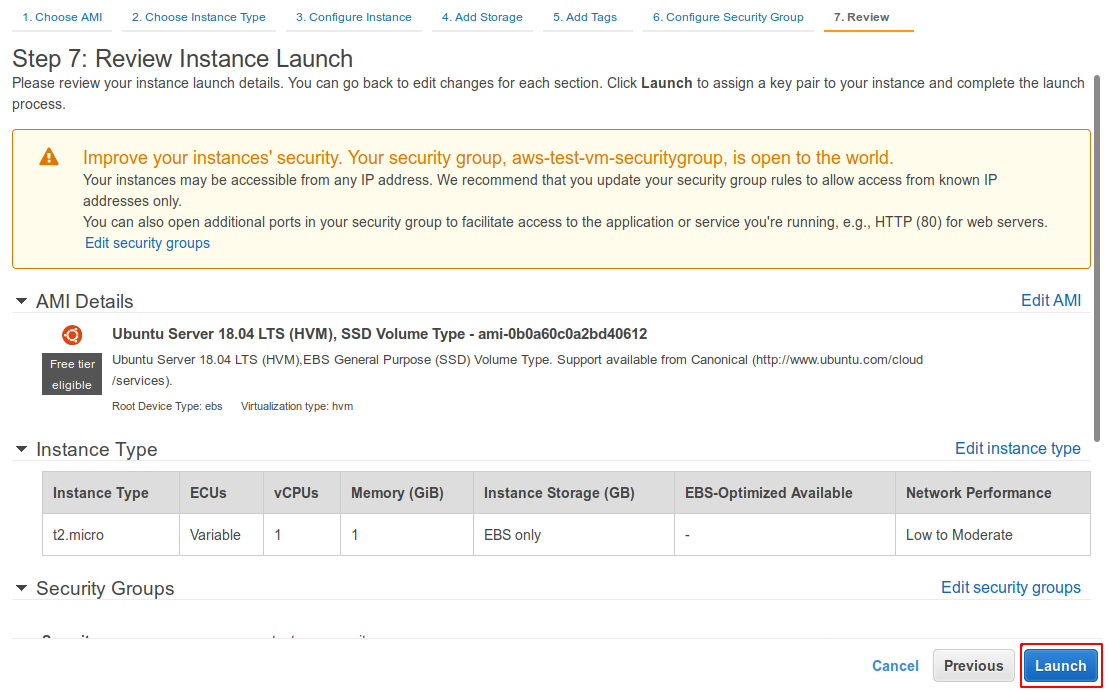
Reviewing our Instance before Launching
We’ll now see an overview of our instance. We can ignore the warning about our instance being “open to the world” we know about that from the last step, but for now, it’s fine, because there’s nothing important on it.
Have a look through the overview and when you’re happy click Launch.
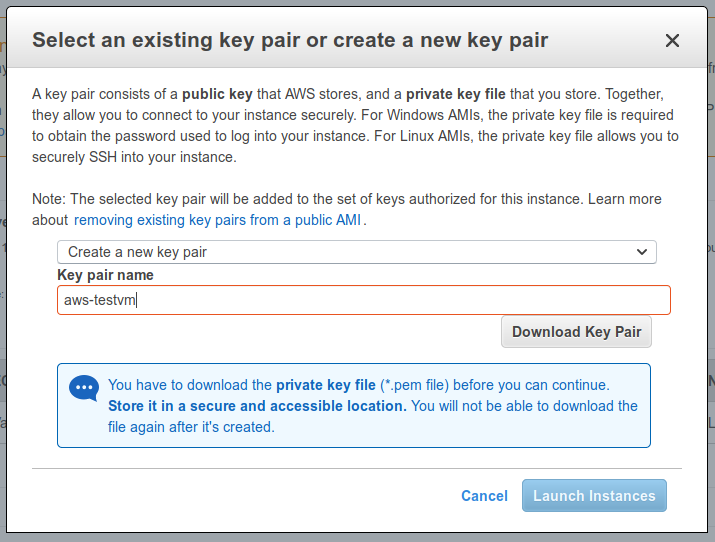
Creating a key pair
We will now be prompted to create or select an existing key pair. As we don’t yet have a key pair, we’ll click on the first drop-down box and choose Create a new key pair. Give your key pair a name so you can identify it in the future. I’m going to go with “aws-testvm”.
Then click on Download Key Pair.
Save the private key to your .ssh folder in your home directory. If you don’t download it here you won’t be able to download it again, so I suppose you’ll just have to terminate your instance and start again! Once downloaded you’ll be able to click on Launch Instances.
Connecting to our AWS Instance
We will now be on the Launch Status page - we’re nearly there now! When you are happy to move on click View Instances.
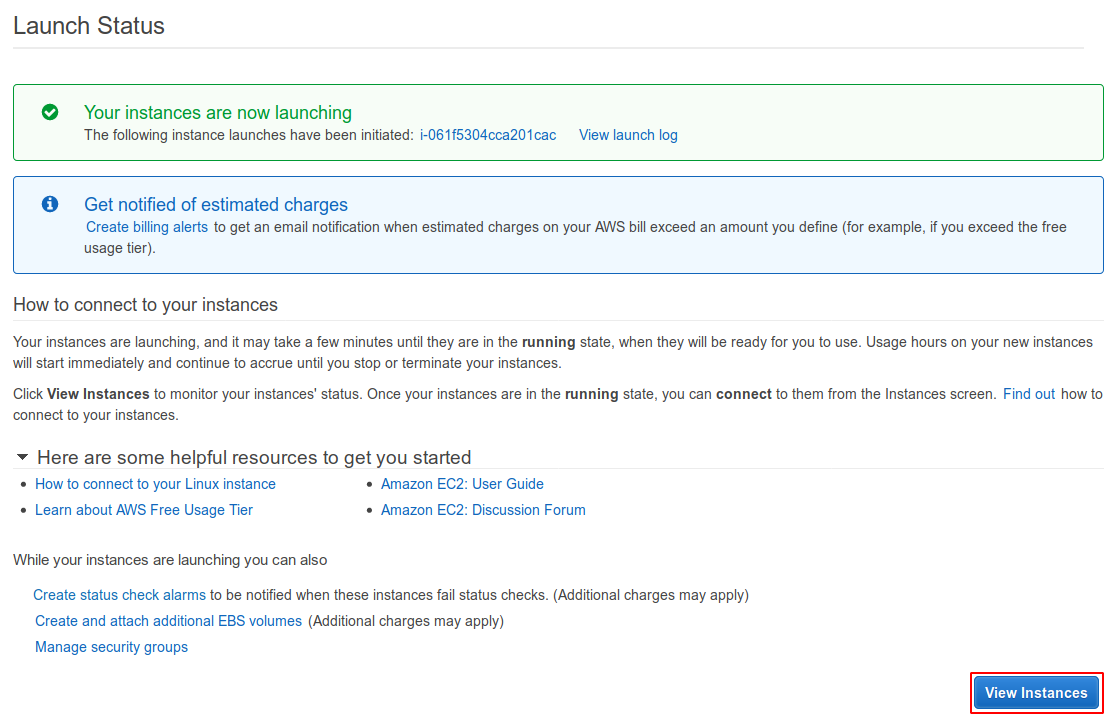
You will now see an overview of your instances, of which, for now, we only have the one. You’ll see our instance is starting up and running through its status checks.

You’ll be able to see under the Status Checks column once the checks have been completed, and then we can connect to it over SSH.

Let’s check we can SSH into it now, with our private key.
Open up a terminal, and take note of the IP address of our instance under the IP address column. In my case, it’s 52.56.32.96.
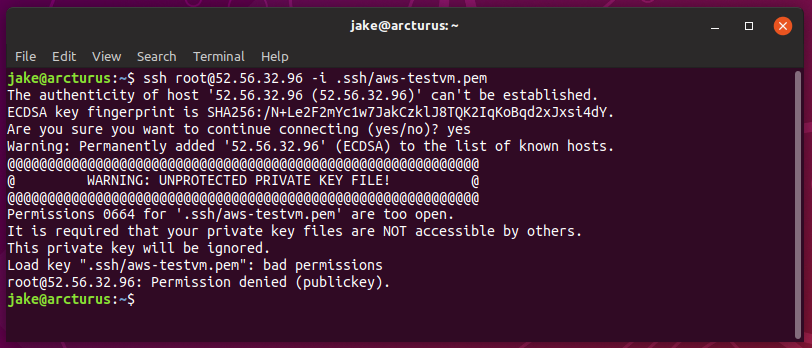
Before we logon, we need to check the file permissions for the private SSH key we just downloaded. You will probably find that it’s permissions are too open, and Amazon won’t let you connect until you fix them.
To do this lets change directory in the terminal.
cd into your .ssh folder and type ls -l and you may find that the key has the below permissions:
-rw-rw-r-- 1 jake jake 1692 Oct 30 18:12 aws-test.pem
The warning states “It is required that your private key files are NOT accessible by others.” So we need to change this to be readable and writeable for ourselves only. This is really simple to do, all we need to do is run chmod:
chmod 400 aws-testvm.pem
The 4 means it’s read only for your user, and the two 0’s mean nobody else can read, write or execute the file.
If you run ls -l again you should now see the changes to the permissions reflected. Notice the difference?
-r-------- 1 jake jake 1696 Nov 1 19:35 aws-testvm.pem
This should make Amazon happy, so let’s try to SSH in again. Make sure this time we log in as ubuntu rather than root. AWS will just tell you to do this anyway and close the connection if you try as root! So let’s save ourselves a few seconds.
ssh ubuntu@52.56.32.96 -i .ssh/aws-testvm.pem
All being well you’ll be straight into your Ubuntu instance on AWS! Woohoo!
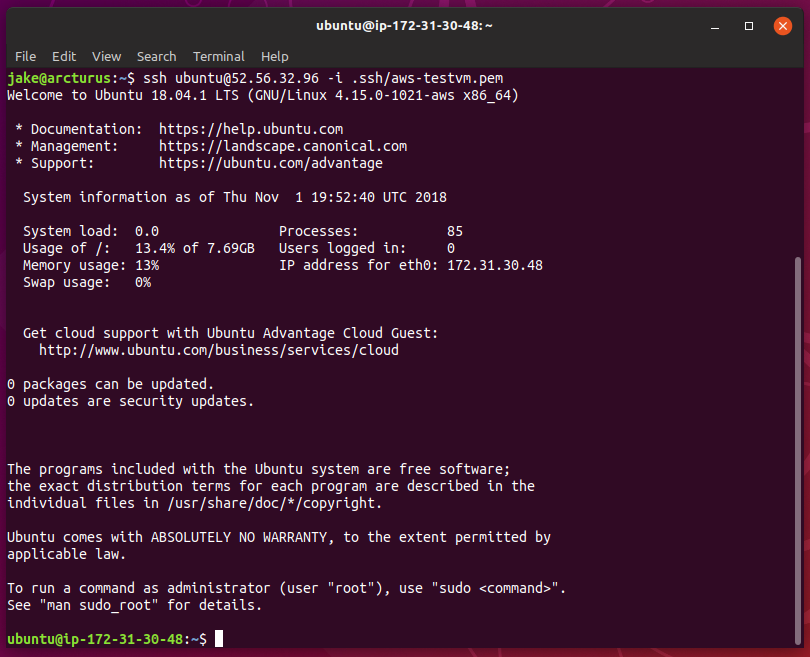
Give it a quick sudo apt update and sudo apt upgrade to make sure everything is working, and that’s it we’re done!
You can now play around with it, and make full use of your free-tier usage or just terminate it, but that would be boring. I plan to use it to host a couple of lightweight docker containers.
That’s all for now, thanks for following along.