I’ve had Docker on my list of tech to learn for a little while now. It seems to be an increasingly important skill to possess in 2018.
I like to self-host alternatives to popular web applications where possible. Not just because I like to think about my privacy online and control my own data, but also because it helps me learn new technology. Docker is a prime example of that. My plan over the next couple of weeks, is to to host a number of services on a VPS and make use of Docker in the process. I’ll blog about that in due course, but for my own benefit and anyone who reads my blog I thought I’d write a “Getting Started” post for installing Docker on Ubuntu Server. It really is easy, so there’s nothing stopping you from playing around with it in the safety of a virtual machine.
So, without further to do let’s dive in…
Prerequisites
You’ll need the following to follow along with this article:
- A VM or machine running an already setup version of Ubuntu Server 18.04
Adding the Docker Repositories
For personal use we need to use Docker Community Edition (CE), as opposed to the Enterprise Edition (EE).
Docker’s own documentation lists a number of ways you can install Docker on Ubuntu, but the easiest way in my opinion is to use the Docker repositories. This makes updating Docker easier, so for now that’ll do just fine.
We’re going to need to install some packages to allow Ubuntu’s apt to use a repo over HTTPS. So, on your Ubuntu server, run the following.
$ sudo apt update
Once updated, we can install the below packages.
$ sudo apt install apt-transport-https ca-certificates curl software-properties-common
We can now add Docker’s official GPG key. To do this we’ll use the curl program and add it to our list of trusted keys used by apt to authenticate packages.
$ curl -fsSL https://download.docker.com/linux/ubuntu/gpg | sudo apt-key add -
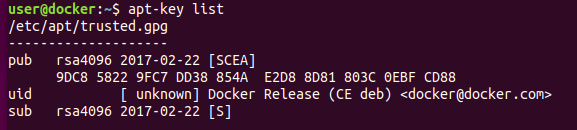
You can check you have the right key, by using apt-key list and making sure the Docker key is listed as below.
We’re now going to add the Docker repository to our server.
We’ll be adding the stable repository. Docker’s documentation says you must always use the “stable repository, even if you want to install builds from the edge or test repositories as well.” You can add edge and test repositorys by adding those words below, after stable if you need them.
$ sudo add-apt-repository "deb [arch=amd64] https://download.docker.com/linux/ubuntu bionic stable"
Installing Docker
Lets update apt again now that we have added the Docker repository.
$ sudo apt update
We can now install Docker. Woohoo! Just run the below.
$ sudo apt install docker-ce
Type y to confirm.

Docker should now be installed, and configured to start on boot, but we can check by doing the following.
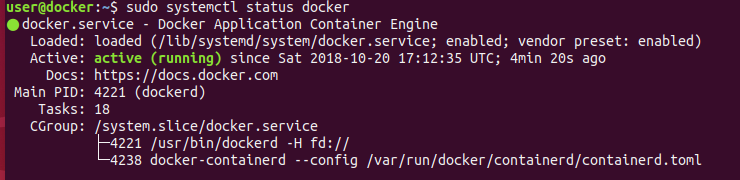
$ sudo systemctl status docker
All being well you’ll get an output like the below. If you see active under Active then you are good to go, Docker is up and running!
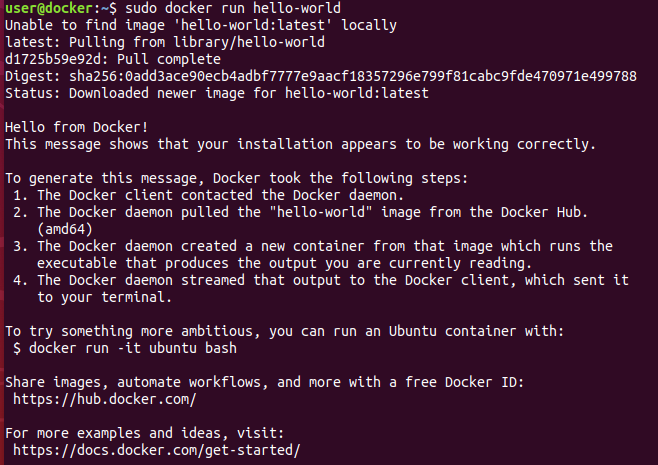
We can verify everything is working correctly by running the Docker hello-world image.
$ sudo docker run hello-world
According to the Docker docs this will download a test image, run it in a container and then when that container runs, it prints out everyone’s favourite message!
You can see the output below. You’ll notice it couldn’t find the image locally, so it downloaded it. Make sure you read the output, as it’s helpful to understand what’s actually happened.
Conclusion
That’s it, simple as that. You can now start running containers with Docker, and learning more - which is what I’ll be doing!