I’ve always said I hate web design, but I happen to think I’m quite good at the design part of it. The problem for me is that despite not particularly enjoying the process, I always find I have a problem when I create a website for myself. The problem being that I’m never happy when using somebody else’s design or theme!
I have to design something myself. Especially for a blog like this, which is effectively my portfolio. I have to make sure it stands out from the crowd and show what I can do.
The design for this blog is still evolving (go and have a look at my GitHub repository)! It’s amazing how much I missed when originally creating it. I’m still ironing out bugs, and tweaking things.
I have some strongly held convictions about design and UX. While I’m far from an expert on such things, and it’s an ongoing process for any product, it does mean I think about it much more than a lot of people do. I strive to make anything I design as readable and well put together as I can, based on my abilities (which, with web development, don’t always match up with what I want to do!).
Up until creating a custom design for my blog, I hadn’t used HTML or CSS (the building blocks of the web) for a few years. One of the things that used to annoy me was just how manual a process writing CSS can be. That was until Sass came along.
I had previously played around with Sass a few years back, having read the excellent primer on it by Dan Cederholm (who was my web design hero when I was growing up) and thought it was great.
I’m no expert, and I’m only really scratching the surface of what’s possible with it but here’s how you can go about getting started with it.
What is Sass?
Sass stands for Syntactically awesome style sheets, and in the words of Wikipedia it’s a:
preprocessor scripting language that is interpreted or compiled into Cascading Style Sheets (CSS)
Sass on Wikipedia
In simple terms it allows you to level up your CSS by using features like variables. That’s primarily what I use it for at the moment.
For instance, instead of manually setting the colour of an element multiple times across your stylesheet, only to then realise you want to try a different colour, you can assign that colour to a variable defined in the stylesheet and only change it once and have it update across the whole stylesheet. Pretty darn handy if I do say so.
For instance, instead of the below style:
.element {
    background-color: #ccc;
    }
We can do this:
$element-color: #ccc;

.element {
    background-color: $element-color;
    }
Notice we define a variable using $.
The power of variables really come into play when you have a big stylesheet and lots of different colours, font’s, and sizes. You can set your variable’s in one place for anything, and then come back to that place to change them across the sheet.
I use them for font type, font size, colour, width and even setting the width on borders!
It makes the whole process of writing CSS much more efficient.
So how can you start using Sass?
Installing and Using Sass.
Well first you need to install it. It really couldn’t be simpler. I use a variant called Dart Sass which is “the primary implementation of Sass”. So I’ll be showing you how to start using that in a Windows environment.
Downloading Dart Sass
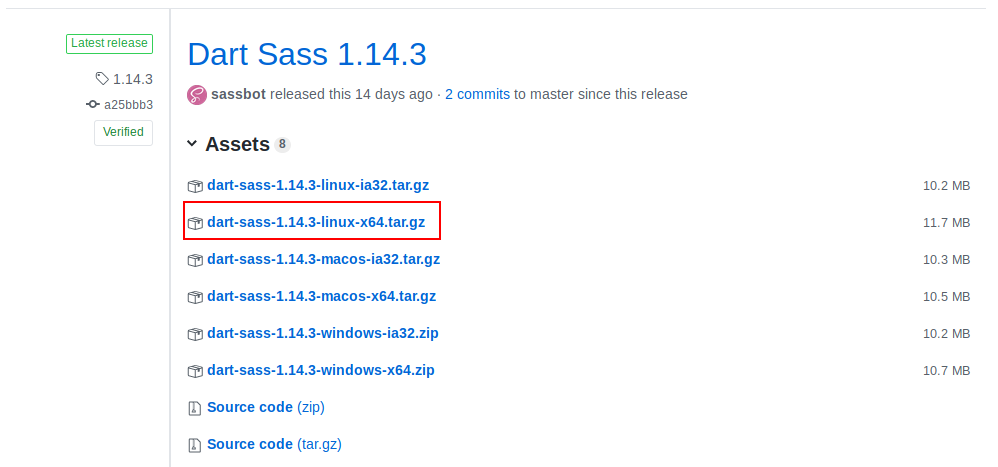
Start by heading over to the Install Sass website and under Install Anywhere (Standalone) click the from GitHub link.

We’ll then be able to choose from several packages. As we’re installing Dart Sass on Windows, select the 64-bit Windows download. Click on the link to download it.
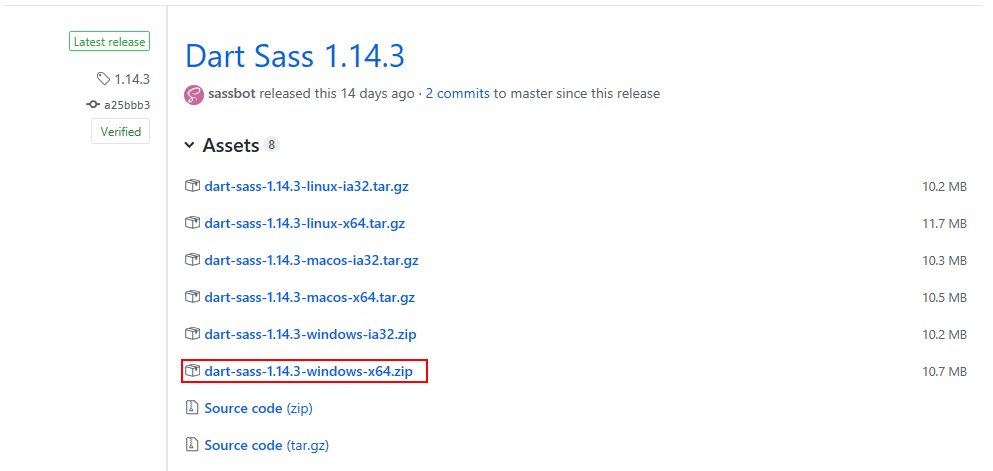
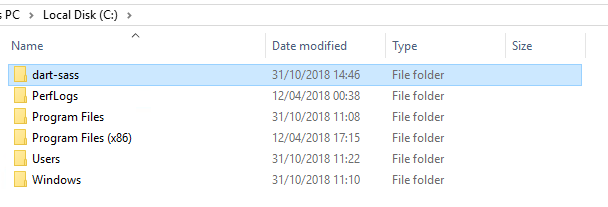
Once the .zip has downloaded (it’s only about 10 MB) you need to extract it. We can then copy the folder to a place it can call home!
Let’s copy it to the root of the C:\ drive.
Adding Dart Sass to the Windows ‘Path’
Next, we need to add it to the system path. This means you can call it from the command line, which is the way we’ll be using it.
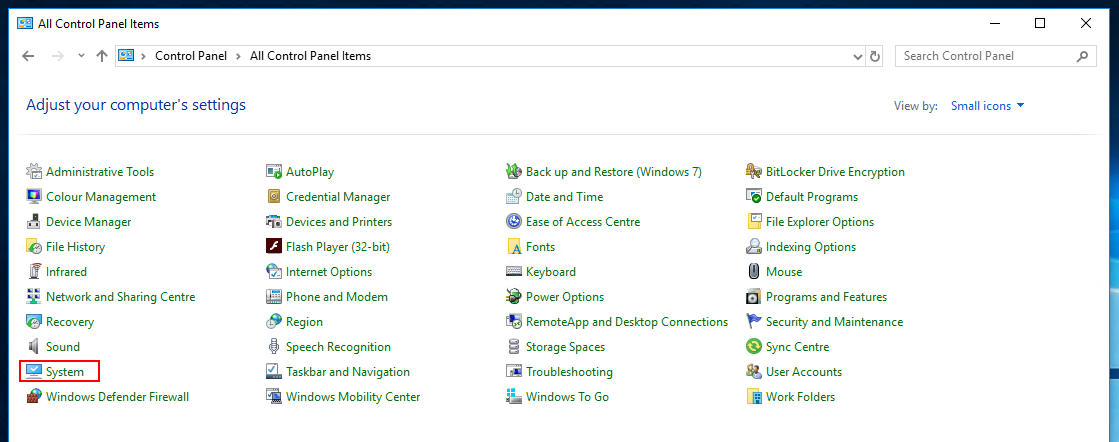
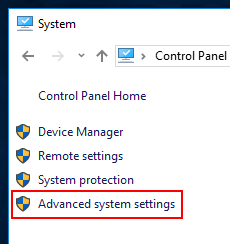
Open up Control Panel and go to System.
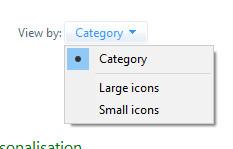
Quick Note:
You may need to change the view to something other than Category if you haven’t done it before to see the full list of Control Panel options.
On the left sidebar click Advanced system settings.
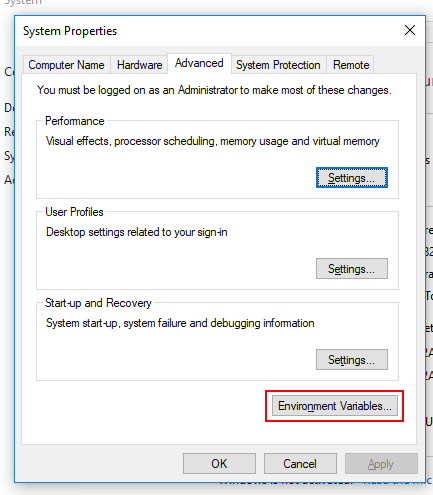
Then at the bottom of the window that pops-up, click Environment Variables.
From the list of variables, we want to select Path and then click Edit.
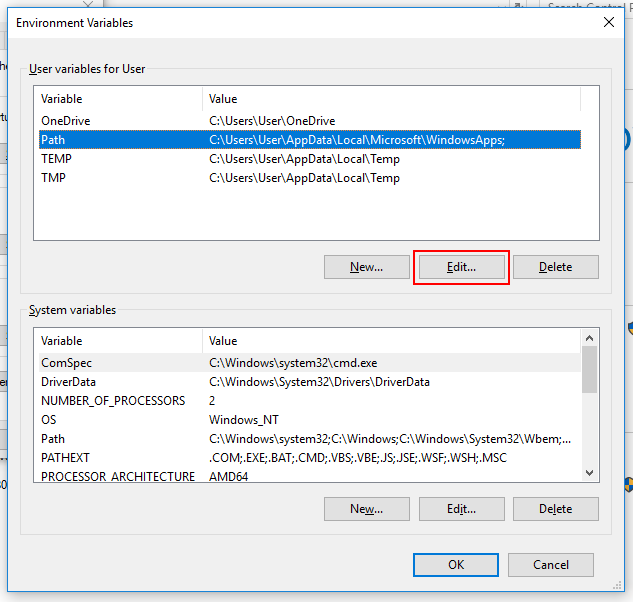
You’ll now see the list of existing entries on your path and can add a new path or edit (and delete) existing ones.
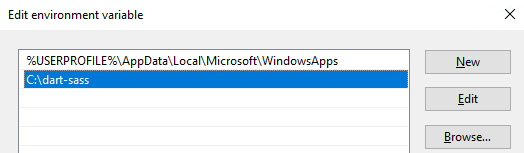
We can simply click New.
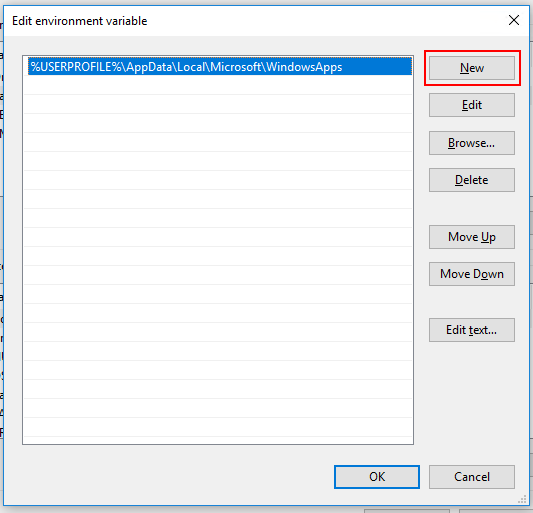
You now need to specify the location path to where you placed the dart-sass folder. In this instance it’s nice and easy, just type C:\dart-sass into the line entry.
You can then press OK to close the path editor, OK again to close Environment Variables and OK again to close System Properties.
Testing it out
Let’s test it out to see if it’s worked.
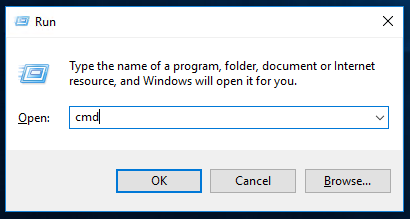
We can do this by opening a command prompt. I always do it with Run, so just Windows Key + R and then type cmd.
Quick Note:
You don’t need to restart your machine, but you do need to re-open any command prompt windows you may have open before you can use the updated path.
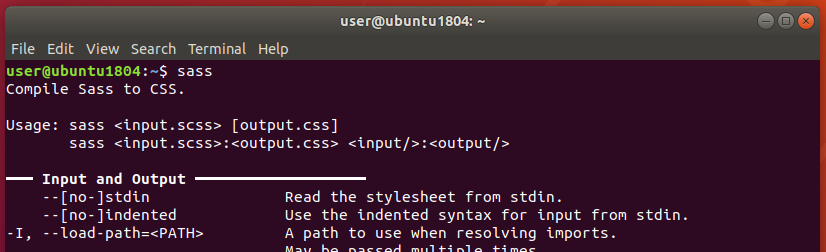
Next type sass in the prompt (the command dart-sass is deprecated) if your path is right, then the sass command line program will run, and you’ll get some info on how to use it.
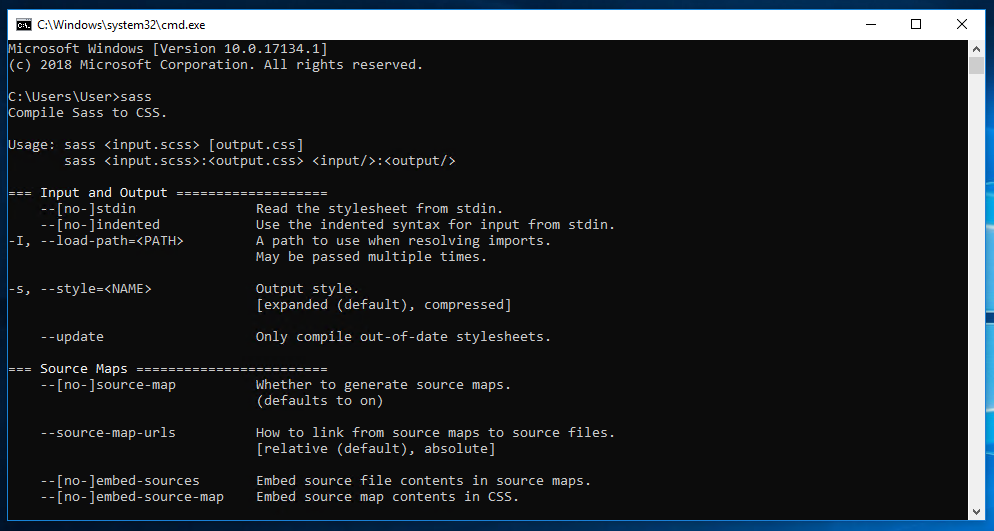
Success! Your now good to go, you can sass the night away!
Sass in action
There is lot of stuff on the web to help you use Sass. Go and DuckDuckGo it. I’m just scratching the surface, which is more than enough for my needs.
However, for my own future reference I thought I’d leave an example Sass command below, just in case I ever forget how to use it.
Here’s the command I work with whenever I am editing my theme:
$ sass --watch assets/css/screen.scss:assets/css/screen.css --style compressed
Simply put we’re telling Sass to --watch my screen.scss file, and compile changes into the screen.css file. We then define a compile --style in this case compressed which alters how the CSS is compiled, and in this instance removes all comments, spaces, and line breaks. Also called minification I believe.
Here’s what happens when I run the command, and make a change to the screen.scss stylesheet and save it.
Here’s an example of a part of my .scss stylesheet before Sass compresses it in the .css file:
ol, ul { list-style: none; }
blockquote, q { quotes: none; }
blockquote:before, blockquote:after, q:before, q:after { content: ''; content: none; }
table { border-collapse: collapse; border-spacing: 0; }

/* global */
a { text-decoration: none; }
body { margin: 0 auto; }

/* sections */
.section { clear: both; padding: 0; margin: 0; }

/* column setup  */
.col { display: block; float:left; margin: 1em 0 1em 1.6%; }
And here’s how the CSS looks after it get’s compressed by Sass.
ol,ul{list-style:none}blockquote,q{quotes:none}blockquote:before,blockquote:after,q:before,q:after{content:"";content:none}table{border-collapse:collapse;border-spacing:0}a{text-decoration:none}body{margin:0 auto}.section{clear:both;padding:0;margin:0}.col{display:block;float:left;margin:1em 0 1em 1.6%}
Instructions for Using Dart Sass on Linux
Effectively you do exactly the same. Except this time you need to download the Linux version of Dart.
Extract that, place the dart-sass folder into your home directory, and then you need to add it to your path.
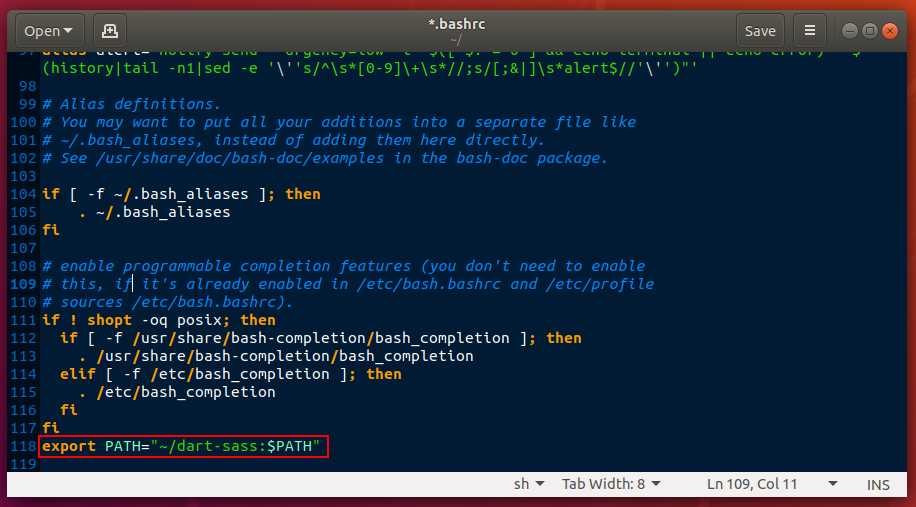
In a text editor navigate to and open .bashrc, it’ll be hidden so you may need to show hidden files/folders.
Scroll down to the bottom of the file and create a new line and type the following:
export PATH="~/dart-sass:$PATH"
It’ll look something like the below if you have no edits made to the file already.
Then run the below in a terminal (you won’t get a result back):
$ source ~/.bashrc
You’ll now be able to call sass in the terminal, just as below:
That’s it, there’s a lot more info on Sass here so head over there if you are interested.
Thanks, as ever, for reading.