My “daily driver” is a Dell XPS laptop. I take it basically everywhere with me, which means I run the risk of leaving it somewhere. I’m far from forgetful, but if I lose it I want to know it’s secure and that nobody is going to be able to access my files.
That’s where hard disk encryption comes in. Specifically, BitLocker, on Microsoft Windows.
If you’re running an OS like Ubuntu, then you can encrypt your hard disk when you’re installing the operating system, and you get to pick a passphrase that’ll you’ll be prompted for every time your device starts, which adds an extra layer of security.
On Windows, you can do the same with BitLocker. It’s a little bit more involved, and you need to be running Windows 10 Pro at the very least, but it’s still relatively simple.
I’m going to take you through the process of enabling BitLocker and setting a start-up PIN below.
Turning BitLocker on
Firstly, we need to turn BitLocker on, for our main hard disk. In almost all circumstances this will be your trusty old C drive!
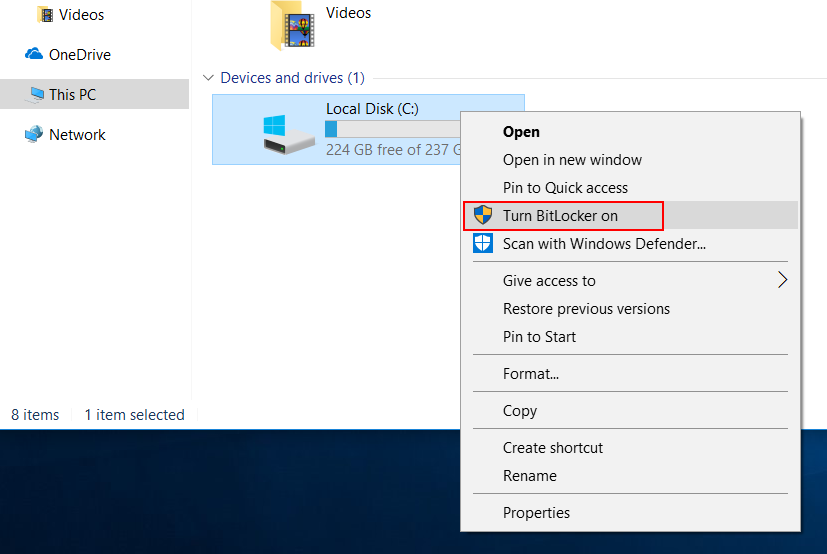
So, open File Explorer, and on the left sidebar navigate to This PC, then under Devices and drives back in the main panel right-click on Local Disk.
Next, select Turn BitLocker on.
A box will pop-up, and BitLocker will start and check your device’s configuration. All being well, if your device is compatible we’ll now need to back up the recovery key that has been created for your device.
You’ll be faced with three options:
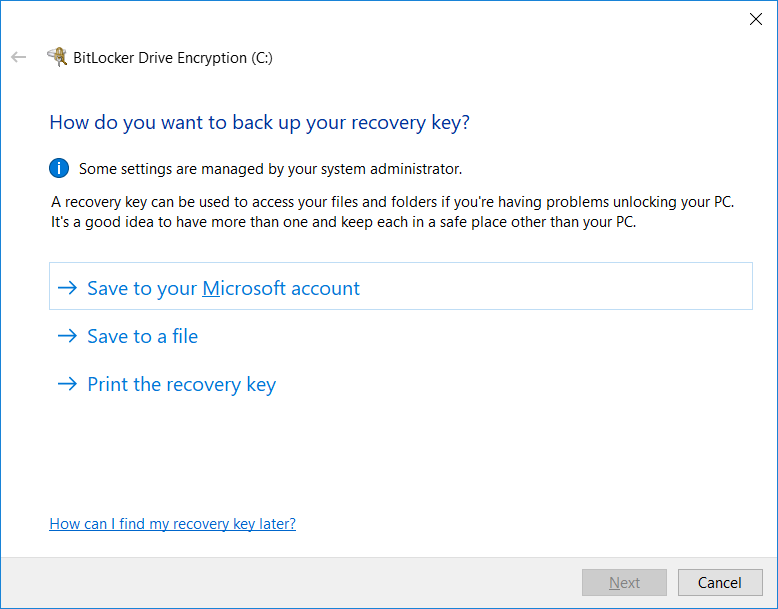
You can’t click Next until you’ve picked an option, also beware that you won’t be able to save it to the drive you are encrypting.
I tend to select Print the recovery key and print it to a PDF using Print to PDF. I can then extract the information from the PDF and store it safely in my password manager. I don’t delete the PDF until I’ve checked it’s synced to another device though, just to make sure I have it first.
Once you’ve selected an option and clicked Next we’ll be told that the drive has been encrypted, and we need to activate BitLocker on it. Simply click Activate BitLocker
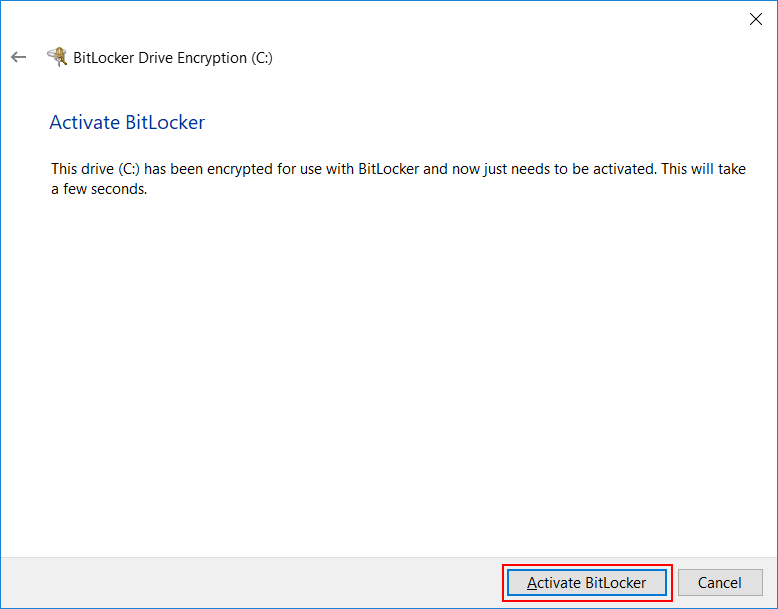
That’s it for the encryption part. Very easy huh? We’ve turned BitLocker on, and our drive is now encrypted.
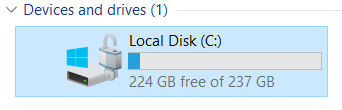
Back in File Explorer it’s good to double check everything looks like it should. Make sure your Local Disk now has a padlock icon over the drive, like the one below. If it does we’re good to move on to the next stage.
Get BitLocker to ask for a PIN at start-up
Although the drive is now encrypted (meaning nobody would be able to access the contents on it without entering the recovery ID), I personally like to enable a start-up PIN to add an extra layer of security.
We need to start by editing our local group policy.
To do this we will be using the Local Group Policy Editor console.
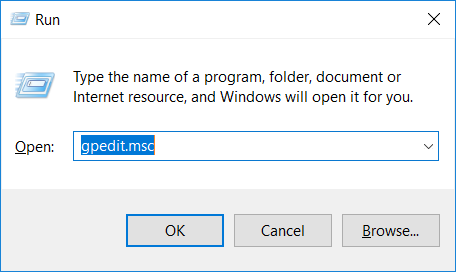
The quickest way to do so is to hold Windows Key + R to open the Run dialog, and then type in gpedit.msc and hit OK.
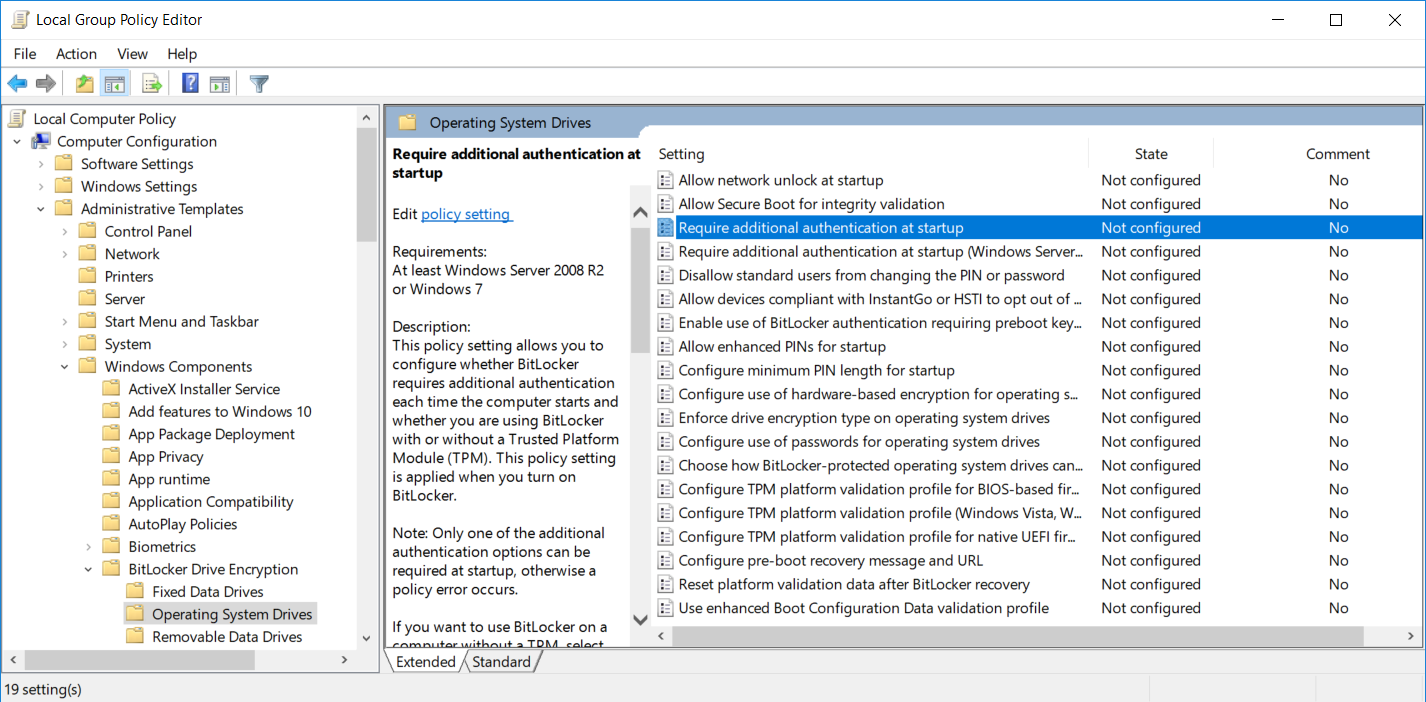
Next, we need to locate the specific group policy setting we’re after at the path below.
Computer Configuration > Administrative Templates > Windows Components > BitLocker Drive Encryption > Operating System Drives
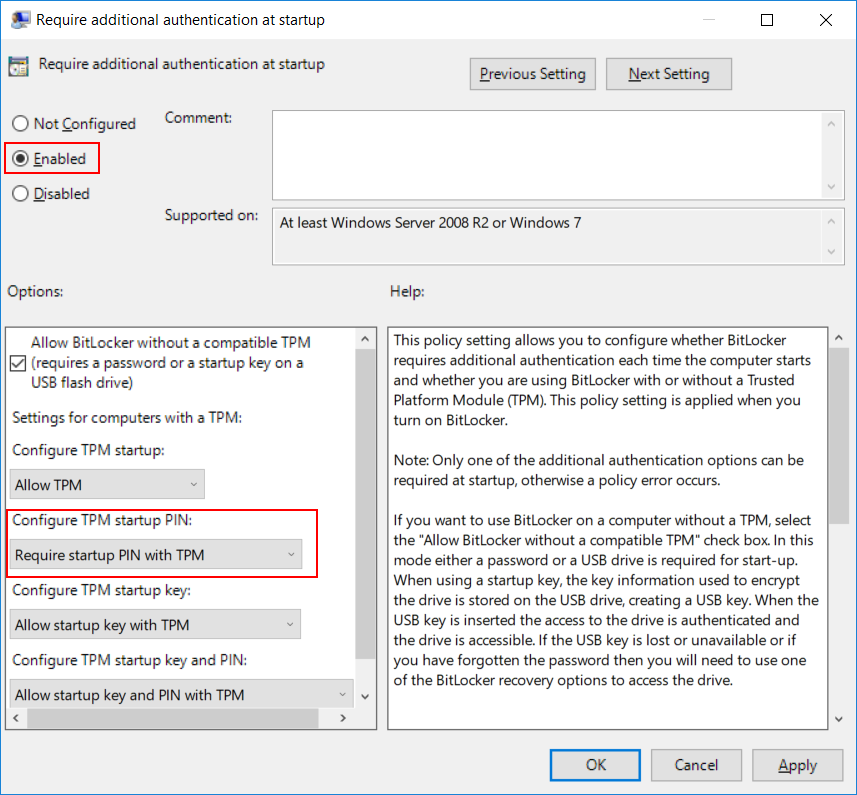
Double click the Require additional authentication at startup setting to open it and then change the status to Enabled.
Next, under Configure TPM startup PIN, change the dropdown box to the Require startup PIN with TPM option. You can then hit OK and close the Group Policy Editor.
Setting the PIN
Finally, it’s time to set our BitLocker start-up PIN.
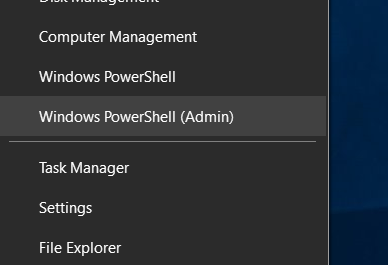
Right-click the Start icon and select Windows PowerShell (Admin) to open an elevated prompt.
We’ll use the Add-BitLockerKeyProtector cmdlet to set our PIN but before we do that a side-note.
I like my PINs to be random as opposed to predictable. So, I like to pick them randomly, otherwise I’ll end up using the same ones everywhere, and they’ll probably be somewhat guessable. So, let’s use PowerShell to get a random number we can use as our PIN.
We can use PowerShell’s Get-Random cmdlet to accomplish this. If I want an eight-digit PIN I would run the below command.
Get-Random -Minimum 10000000 -Maximum 99999999
That’ll return a random number within the number range I provided. I’ve only picked that range as I want an 8-digit number. You can alter that to whatever you want, or remove those parameters entirely, but you get the idea - let the computer do the hard work so you don’t have to!
PS C:\Windows\system32> Get-Random -Minimum 10000000 -Maximum 99999999
48218302
Anyway, let’s get back on track, we’re nearly there. Time to set our start-up PIN.
You never know who’s watching, so let’s create a quick secure prompt to type our PIN into which will be hidden using the usual password asterisks, and store it, securely in a variable called $PIN.
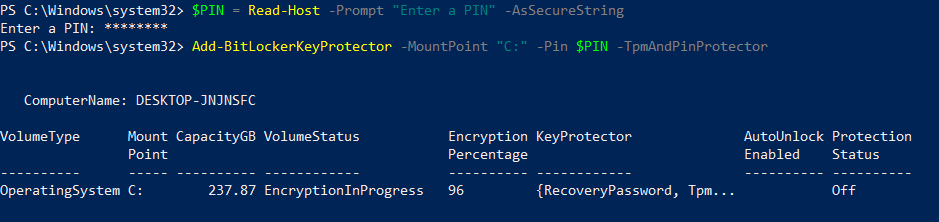
$PIN = Read-Host -Prompt "Enter a PIN" -AsSecureString
Next, we need to set the PIN on our BitLocker encrypted hard disk. It’s a simple command, and we’ll call upon the variable we just created. The key parameter here, (other than -Pin) is -TpmAndPinProtector so make sure you include that.
Add-BitLockerKeyProtector -MountPoint "C:" -Pin $PIN -TpmAndPinProtector
All being well, you’ll get the below results back to confirm you’ve successfully added the PIN to the disk.
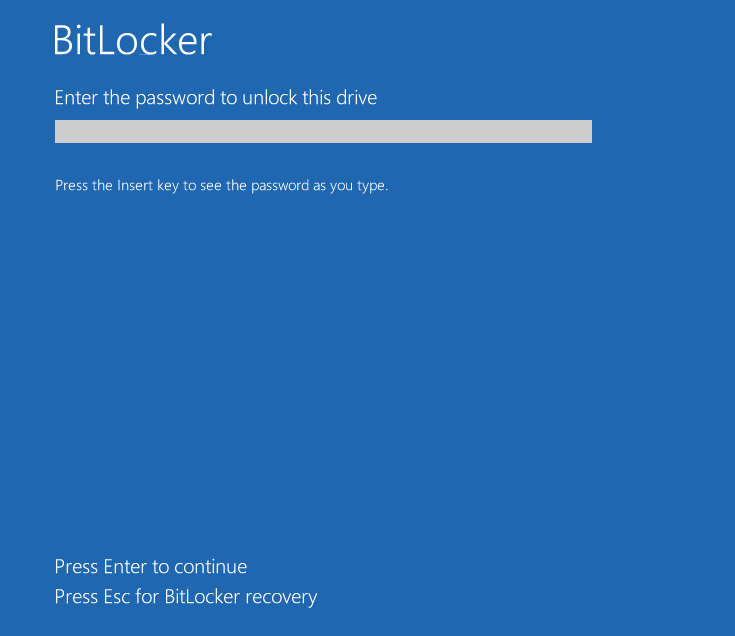
We should now be good to go, but it’s always worth testing it out with a quick restart to make sure it’s working as expected and your PIN is accepted.
So, when you restart next you’ll be faced with a blue screen like the one below (except it will say “PIN” instead of “password”. Don’t panic, it’s a good blue screen (if you know the PIN!) pop your PIN in and away you go, Windows will load as usual.
That’s it, it wasn’t too hard was it! You can now rest assured that you’ve fully encrypted your hard disk and even have an extra layer of security in the form of your PIN.