There are a few different tools out there for virtually creating a tech lab, including VMware and the superb (and open source) VirtualBox. I’ve previously used VirtualBox for labs I’ve created, but I’m now using Hyper-V for my virtualisation needs, and it does the job really well for my requirements. A plus is that you can automate virtual machine deployments with PowerShell, and that opens up lots of cool possibilities.
As I’ve mentioned before, I’m currently teaching myself PowerShell, and one of my self-set targets is to automate as many processes as I can in my day job. However, you can only go so far before you realise your not willing to risk messing something up in production when writing a script, or even just because you don’t want to mess up Active Directory & Exchange with too many more test accounts - that’s what a virtual machine lab is perfect for!
It doesn’t even need to be particuarly complicated, you have the freedom and flexibility (hardware dependent) to keep it simple, but at the same time you can make a really complicated setup if need be.
As a start, I’ll show you how you can use Hyper-V to create a virtual machine to install Windows Server 2016 on to.
I’m not going to go through the installation process of Windows Server 2016 (it’s pretty simple) in this post - it’ll make a long post even longer, but I’ll tell you where you can get a copy from. Head on over to Microsoft’s Evaluation Center and download yourself an evaluation copy of Windows Server 2016. You get 180 days to mess around with it, (you can actually use a tool called sysprep to “re-arm” it to get some more time out of the evaluation - plenty of time to mess around with it). You’ll need to “register”, and then you can download the ISO (bare in mind it’s over 6 GB, so it may take a while to download).
Make sure your running Windows 10 Pro or Enterprise, Hyper-V won’t work with Windows 10 Home, and make sure your using 64-bit Windows. You’ll also need to make sure you have enough RAM, officially, you need 2GB additional RAM on top of Microsoft’s published Windows 10 minimum specifications of 4 GB, but that’s not going to cut it at all. Realistically you need a beefy machine with at least 8GB RAM, but ideally 16GB or more. The more memory and CPU you can spare for your virtual machine’s, the better your virtual machines will run, and the more productive your labs can be.
You’ve got to enable Hyper-V before you can use it. Firstly you need to make sure Virtualisation is on in your BIOS, and secondly it’s a Windows feature you need to turn on (Control Panel > Programs and Features > Turn Windows features on or off.) Here’s a quick guide if your not sure: https://docs.microsoft.com/en-us/virtualization/hyper-v-on-windows/quick-start/enable-hyper-v
Once Hyper-V has been installed your ready to go.
I’m going to start by showing you how to do this in PowerShell, as it’s so much quicker. I’ll then show you the steps you can take in the GUI to do the same thing.
We’re going to create a virtual machine with 25 GB of hard disk space, and 4 GB RAM. We’re then also going to need to point it to the Windows Server 2016 ISO we downloaded, so we can install it.
Using PowerShell to create a Hyper-V Virtual Machine
Open up Windows PowerShell as an Administrator.
Firstly, we need to create a Switch so that our virtual machine can connect to the internet. You can have three different type’s of switches (External, Internal & Private), by default this command will create an External switch, and we’re going to keep it like that as it’s easier to understand for now.
All you need to know is it allows you to connect to the internet through your host machine’s network adapter.Type the following command into PowerShell:
New-VMSwitch "Switch" -NetAdapterName "Ethernet" -MinimumBandwidthMode Weight
You’ll get the following back if the command has successfully created a switch:

Note that you can call the switch anything you want, I’ve called it, simply “Switch”, furthermore, you need to know the name of your network adapter so you know what to put in for -NetAdapterName. Run Get-NetAdapter to find out the name to use if you don’t know. You can see the name on my PC is simply Ethernet:

We’ll now create our virtual machine, using the New-VM cmdlet, so type the following into the console:
New-VM -Name "SERVER2016" -Generation 2 -MemoryStartupBytes 4GB -SwitchName "Switch" -NewVHDPath C:\VHD\SERVER2016.vhdx -NewVHDSizeBytes 25GB
Once again, if successful, PowerShell will return the following:

We now want to load the ISO of Windows Server 2016 into our virtual machine, so that when we start it, it’ll boot into the Installer for Windows Server 2016.To do this, we need to add a virtual DVD drive, we can accomplish this with two commands, firstly we need to create a virtual SCSI controller:
Add-VMScsiController -VMName SERVER2016
You won’t get any feedback for this command, it’ll just go to another PowerShell prompt, but if you haven’t had an error returned, your good to go.
Next, we need to create a virtual DVD drive attached to our SCSI controller, and point it to the downloaded Windows Server 2016 ISO using the following command:
Add-VMDvdDrive -VMName SERVER2016 -Path D:\ISO\14393.0.161119-1705.RS1_REFRESH_SERVER_EVAL_X64FRE_EN-US.ISO
Again, you won’t get any feedback from PowerShell other than a new prompt, but if you do this wrong, you’ll get an error - so no error means all’s good.
You can run a quick check though:
Get-VMDvdDrive "SERVER2016"
If you see that the Path is populated with the path you just put in to the ISO, then you know your good to go.

That’s it, our Windows Server 2016 virtual machine has been created and we’re ready to boot it up. Now, you can start the VM in PowerShell using this command:
Start-VM SERVER2016
The problem with that in this instance is, the Windows Server ISO requires you to press a key to start the installer, if it’s missed, then it try’s to PXE boot, which won’t work either.
So you could run the above command, and quickly open the VM in the GUI to press a key, or you can just start the VM from the Hyper-V GUI and press a button - much easier - but kinda breaks the automation part of this.
I’m sure there is a way to send a keystroke to the virtual machine after starting it via PowerShell, but I haven’t found it yet. I expect you can probably get around this by initially installing Windows Server, sysprepping it, and automating the deployment using the sysprepped image instead. (I’ll explain more on sysprep in future posts - in the mean time Google it, or DuckDuckGo it!
Update - 18/11/2017 - I just by chance came across an article this morning saying that Server 1803 will fix this issue “As of this build, Server Insiders get the choice of ISO format or VHDX format, with images pre-keyed, allieviating the need to enter a key during setup.” -http://www.zdnet.com/article/microsoft-releases-first-test-build-of-windows-server-1803/
Using Hyper-V Manager to create a Hyper-V Virtual Machine
I’m sure you’ll agree that using PowerShell to create a VM was really easy and pretty darn cool. If you ignore all my waffle, it’s just a few commands to run! You can see from this, that there’s loads of potential for quickly automating the deployment of lots of virtual machine’s without any input. Even more so if you have a base virtual hard drive with the operating system already installed. You could be up and running with a whole lab really quickly.
So let me now show you how to do what we’ve just done in Hyper-V’s graphical user interface: Hyper-V Manager. It’s just as easy, but a lot more clicking and you can’t automate it in the same way.
Open up Hyper-V Manager by clicking Start and typing: Hyper-V Manager. If your going to use it a lot, make sure you pin it to your start menu, or start bar.

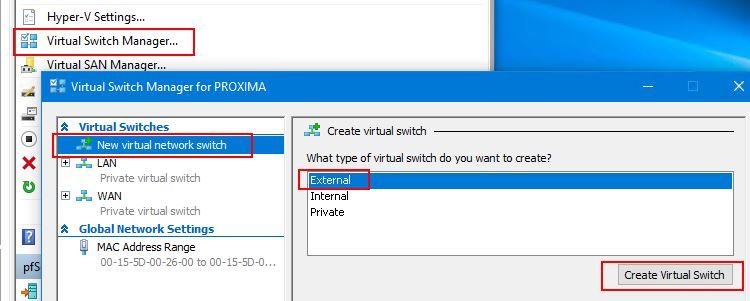
Let’s start by creating a switch to enable our virtual machine to access the internet.On the right hand sidebar click Virtual Switch Manager and in the box that pops up make sure New virtual network switch is selected on the left hand sidebar, and then ensure you’ve selected External. You can then click Create Virtual Switch.
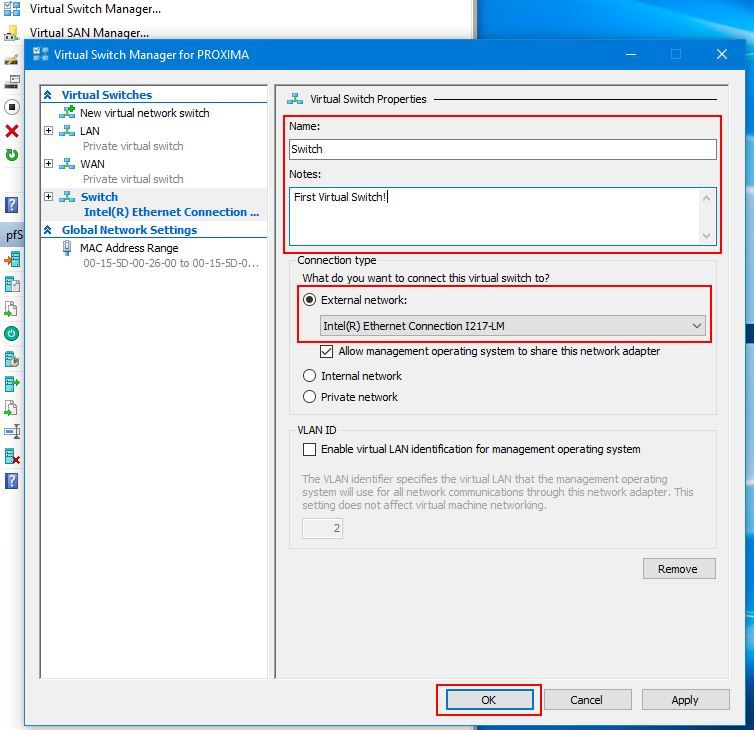
Next you will need to name your Virtual Switch (you don’t have to, but it make’s things easier), it may be handy to add some notes if you plan on having more than one virtual switch. Make sure you select External network, and then the network adaptor you wish to use. You can ignore everything else, and click OK. You’ll get a warning that “Pending changes may disrupt network connectivity” - so be aware if your doing anything that may fail if the connection drops out for a second. If your doing all this using RDP, you’ll lose your connection for a bit too, but don’t worry it will come back.
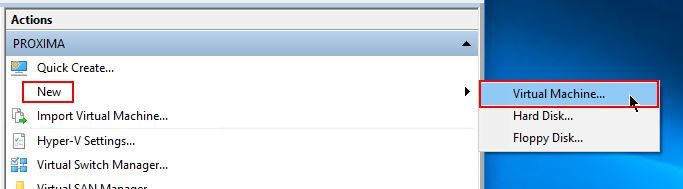
With our virtual switch created, we can now create our virtual machine (bare in mind that you don’t have to create a virtual switch at all for a working VM). Under Actions on the right hand sidebar, click New and then Virtual Machine.
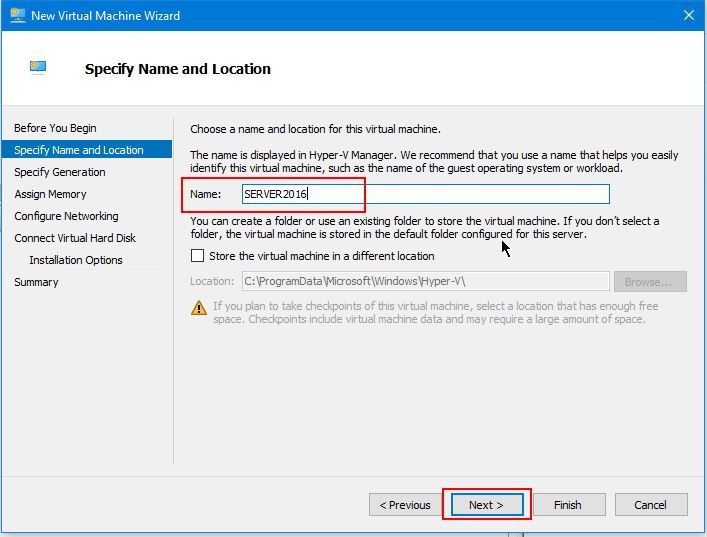
The New Virtual Machine Wizard will pop up. Let’s give our virtual machine a name here, whatever you want. You can also choose to store the virtual machine in a different location if your low on space on your C drive. When you’ve named your VM, click Next.
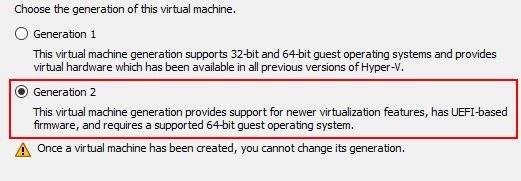
Next, select the Generation you want your virtual machine to be, we’ll go with Generation 2, to ensure we have UEFI based firmware. Choose carefully, you can’t change the generation after you’ve created your virtual machine. Click Next.
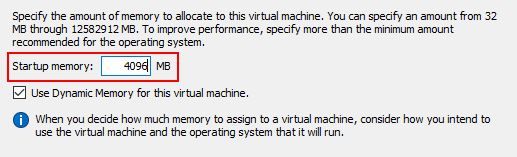
Assign some RAM/Memory to your virtual machine, and make sure Dynamic Memory is selected (which stops the RAM from being fixed to 4 GB, and allows it to go beyond that if required). We’re going to give our Windows Server VM 4 GB. Click Next.
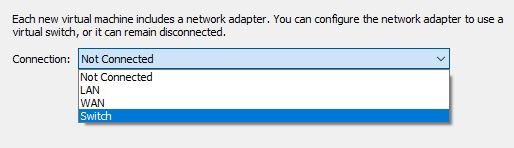
Now we can select the virtual switch we created earlier. (Note I have two switches already configured, but you’ll probably only see your one if this is your first time in Hyper-V) Click Next.
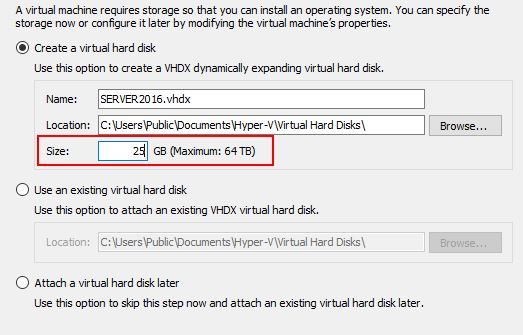
Now we can create our virtual hard disk, give it 25 GB. You can change the location if you need too, and even re-name it, but we’re going to leave the defaults here, which will map back to the name of your virtual machine, and the default save location. Click Next.
Finally, we want to select an image to load onto our virtual machine, in this case our downloaded ISO of Windows Server 2016. Select the second option Install an operating system from a bootable image file, and then click on Browse and navigate to your Windows Server 2016 ISO, then click Next.

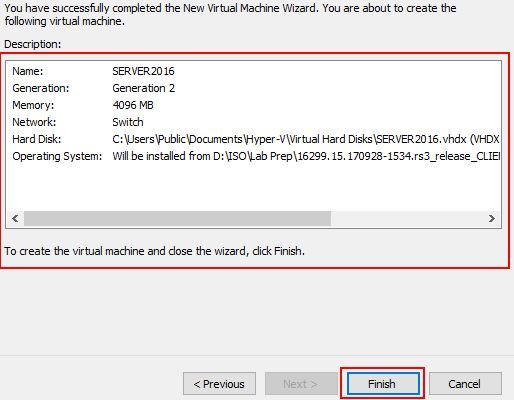
Finally we see a summary of the options we have selected and we can click Finish to create our virtual machine.
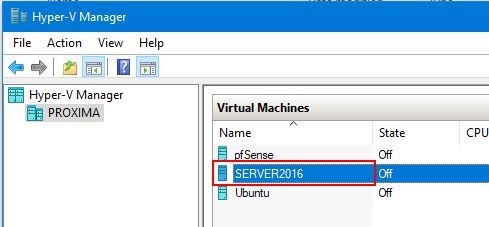
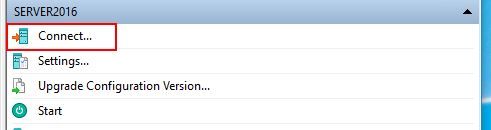
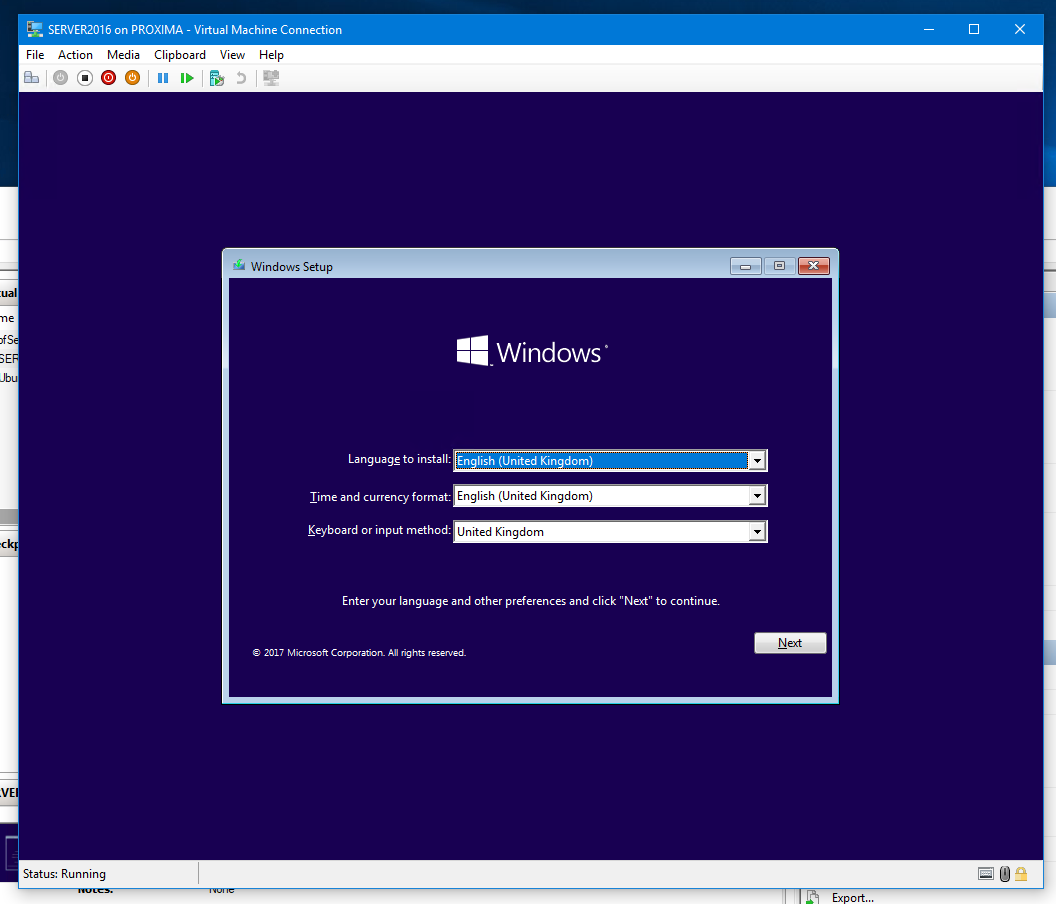
Now that our virtual machine has been created we can connect to it and start it. Select your VM in the middle content area that lists your Virtual Machines. On the right hand sidebar, click Connect, and then in the box that pops up, click Start.
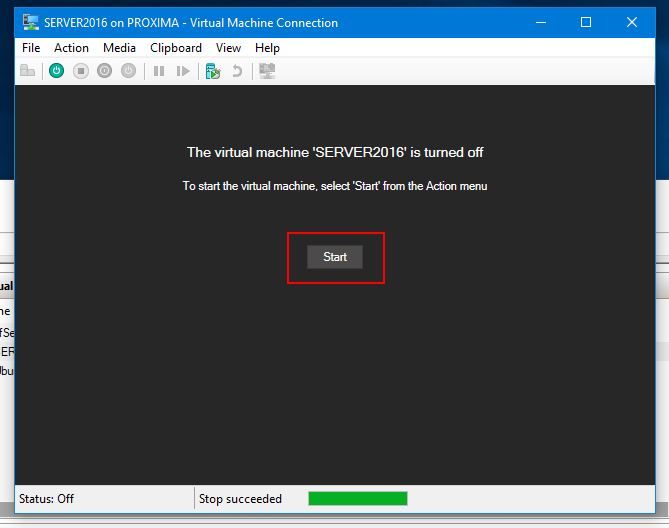
Make sure, when prompted you press a key to launch the Windows Server 2016 installer. If all is successful you should shortly get to the first screen of Windows Setup for Windows Server 2016.
That’s it, that’s all there is to it.
Thanks for following along. I hope to post some more about how to install Windows Server 2016, and then how you can set up Active Directory Domain Services and promote your virtual machine to a domain controller. Which is really handy for creating your own domain network purely from virtual machines, which are ideal when it comes to replicating a business network.
Stay tuned!